Software Installation Manual
School of Digital Circuit Synthesis · basics-graphics-music · edition of 5 October 2026
top ↑1. Introduction
This manual describes how to install the software needed for the lab
exercises of the School of Digital Circuit Synthesis and, more generally, for
working with the basics-graphics-music repository of examples
(BGM from here on).
It replaces the previous edition,
Инструкция_по_установке_ПО.pdf, dated 3 October 2025. The
photographs and screenshots from that edition are kept. Wherever a statement
has gone out of date, a Used to be true note next to it explains what
changed. The complete list of discrepancies is collected in a
separate file.
1.1. The School of Digital Circuit Synthesis
The School of Digital Circuit Synthesis (Школа синтеза цифровых схем) is a free educational programme run by YADRO. It covers digital design: RTL development, functional verification and the basics of chip design.
According to the School's own site the programme brings together more than 2000 participants and 24 universities in Russia and Belarus. Classes in the 2026/2027 season run on Saturdays from 12:00 to 15:00 Moscow time — in person at university clusters and online with recordings. Participation is free; YADRO offers project work with its own engineers, internships and a talent pool.
Current information and registration: edu.yadro.com/chip-design-school.
If you are reading the English or Portuguese edition, you are most likely here for BGM itself rather than for the School. Everything in sections 3 and onwards applies the same way; only the references to the School and its chat are specific to it. The same examples are used at the international seminars (see section 1.2).
1.2. The basics-graphics-music repository
BGM is a collection of portable SystemVerilog examples for FPGA boards and
for custom chips. More than 60 people have contributed to it
(69 authors according to git log at the time this edition was
prepared); the lead developer is Yuri Panchul.
The repository is used by the School of Digital Circuit Synthesis and at seminars in several countries: Bishkek (2022), Tbilisi (2023), Baku and Hacker Dojo in Silicon Valley (2024), Tijuana and Yerevan (2025).
There are three copies of the repository, and the choice between them matters:
| Purpose | Address |
|---|---|
| Development copy, experimental | github.com/yuri-panchul/basics-graphics-music |
| Stable copy for the School of Digital Circuit Synthesis | github.com/chipdesignschool/basics-graphics-music |
| Stable copy for the international seminars | github.com/verilog-meetup/basics-graphics-music |
For the School's classes, use the chipdesignschool
copy: it stays stable through the semester. The
yuri-panchul copy is the working one — development happens there
and behaviour can change any day.
What makes BGM different from other collections of examples
- The same script drives every toolchain. Depending on the
board you selected,
03_synthesize_for_fpga.bashruns Altera Quartus, AMD Vivado, Gowin EDA or the open-source Yosys flow. A student does not have to learn the GUI of each of those programs in order to start. - Graphics and sound from the very beginning. The examples drive HDMI, VGA, LCD screens and LED matrices, recognise musical notes through a microphone and synthesise sound through a DAC and an amplifier — rather than blinking an abstract LED.
- Microarchitecture as practised in industry. There are examples with pipelines, FIFO queues and credit-based flow control — exactly the topics that come up in job interviews.
- 54 boards from four FPGA vendors are supported by the same example code (see section 3).
More about the structure of the course in section 8, and in this article (in Russian): habr.com/ru/articles/1071736.
1.3. The systemverilog-homework repository
systemverilog-homework (SVH) is a set of small SystemVerilog
exercises with automatic checking. It complements BGM: in BGM the examples run
on a board, while in SVH you practise language constructs and
microarchitectural techniques in a simulator.
| Purpose | Address |
|---|---|
| Copy used by the School | github.com/chipdesignschool/systemverilog-homework |
| Development copy | github.com/yuri-panchul/systemverilog-homework |
| Copy used by the international seminars | github.com/verilog-meetup/systemverilog-homework |
SVH needs only Icarus Verilog and Git — no board and no vendor toolchain. See section 9.
1.4. Turning the examples into a custom chip
The BGM examples are not limited to FPGA boards; they can be turned into a real chip.
- Tiny Tapeout is a service that collects projects from many
participants onto a single die (an MPW, or shuttle, run) and has it
manufactured. There is a template for BGM that takes the
lab_topmodule out of an example. See section 10 and the article habr.com/ru/articles/1084844. - LibreLane is an open-source RTL-to-GDSII flow you can run
locally. In BGM it is driven by
07_synthesize_for_asic.bash, and the layout can be inspected with the08_and09_scripts. Installation is in section 4.1.11.
The previous edition described installing
OpenLane through Docker. The repository now uses
LibreLane — the continuation of the same project, installed
through Nix. The old 00_setup_open_lane.source_bash script is
still present in the repository, but
00_setup_libre_lane.source_bash is the one that matters.
top ↑2. What changed since the previous edition
A short overview; the technical detail is in the corresponding sections, and a line-by-line analysis of the previous edition is in the errata file.
| Topic | What is new |
|---|---|
| Altera instead of Intel | Intel is Altera again. Quartus Lite 25.1 installs into
altera_lite and Quartus Pro into altera_pro.
The scripts know all eight spellings of the vendor directory. |
| Old versions of Quartus | Cyclone II boards (DE1, DE2) need Quartus II 13.0sp1; Cyclone III boards (DE0, Marsohod MCY316) need 13.1 or 13.0sp1. Newer versions no longer support those families at all. |
| Quartus Pro and a new board | The Terasic DE23-Lite (Agilex 3) requires the Pro edition together with a free licence. No Lite edition can build for that chip. |
| Finding the tools | Setting PATH is no longer required — the scripts locate
Quartus, Vivado, Gowin EDA, Icarus and the rest on their own. |
| USB Blaster III | A udev rule for USB Blaster III (idProduct 6022) has been
added; it is needed for the DE23-Lite. |
| Icarus Verilog | Version 13 is the minimum, 14 is better. The previous edition described version 12. |
| OSS CAD Suite | The open-source flow for Gowin and Lattice boards; it also contains its own Icarus Verilog, which the scripts can use. |
| Surfer | A waveform viewer, an alternative to GTKWave, available both as a
program and as a VS Code extension. If surfer is found, the
scripts use it. |
| LibreLane instead of OpenLane | The whole OpenLane section has been rewritten. |
| XPACK RISC-V GCC | The C and assembly compiler for programs that run on the
aps (MIET), yrv and picorv32 cores
inside the FPGA. |
| Terminal programs | 14_run_terminal_program.bash works with minicom, picocom
and putty. |
| More boards | 54 boards instead of the 39 in the previous list. The scripts also gained support for the Efinity toolchain for Efinix FPGAs, but there is no active Efinix board yet — see section 11. |
| A renamed setup script | 00_setup_intel_fpga.source_bash is now
00_setup_altera.source_bash. |
| Obsolete addresses | The gitflic.ru repositories are no longer used, and
valid-ready-etc is obsolete. Everything is on GitHub. |
top ↑3. Supported boards and the toolchain versions they need
The repository supports 54 boards built on FPGAs from four
vendors. The table below is a copy of
boards/README.md
in the repository, where the same data also exists
in Russian
and in .html and .csv form. The data here is read
from that repository's boards/README.csv, so this table cannot
drift away from it.
| FPGA manufacturer | Board manufacturer | Board | FPGA family | Toolchain with acceptable versions | TM1638 | Graphics wired |
|---|---|---|---|---|---|---|
| Altera | ALINX | alinx_ax301 | Cyclone IV E | Quartus 13.0sp1 through 25.1std | never | VGA |
| Altera | ALINX | alinx_ax4010 | Cyclone IV E | Quartus 13.0sp1 through 25.1std | never | VGA |
| Altera | Altera | dk_dev_3c120n | Cyclone III | Quartus 13.1 and older | never | none |
| Altera | Marsohod | marsohod_mcy112 | Cyclone | Quartus 9.1 SP2; a licence is needed from 13.0sp1 on † | never | none |
| Altera | Marsohod | marsohod_mcy316 | Cyclone III | Quartus 13.1 and older | never | none |
| Altera | OMDAZZ | omdazz | Cyclone IV E | Quartus 13.0sp1 through 25.1std | never | VGA + LCD |
| Altera | OMDAZZ | omdazz_epm570 | MAX II | Quartus 13.0sp1 through 25.1std | never | VGA + LCD |
| Altera | Piswords | piswords6 | Cyclone IV E | Quartus 13.0sp1 through 25.1std | never | VGA |
| Altera | Terasic | c5gx | Cyclone V | Quartus 13.0sp1 through 25.1std | never | HDMI/DVI |
| Altera | Terasic | de0 | Cyclone III | Quartus 13.1 and older | never | VGA |
| Altera | Terasic | de0_cv | Cyclone V | Quartus 13.0sp1 through 25.1std | never | VGA |
| Altera | Terasic | de0_nano | Cyclone IV E | Quartus 13.0sp1 through 25.1std | always | VGA |
| Altera | Terasic | de0_nano_soc | Cyclone V | Quartus 13.0sp1 through 25.1std | always | VGA |
| Altera | Terasic | de1 | Cyclone II | Quartus 13.0sp1 and older | never | VGA |
| Altera | Terasic | de10_lite | MAX 10 | Quartus 14.0.2 and newer † | either | VGA |
| Altera | Terasic | de10_nano | Cyclone V | Quartus 13.0sp1 through 25.1std | always | HDMI/DVI |
| Altera | Terasic | de1_soc | Cyclone V | Quartus 13.0sp1 through 25.1std | never | VGA |
| Altera | Terasic | de2 | Cyclone II | Quartus 13.0sp1 and older | never | VGA |
| Altera | Terasic | de23_lite | Agilex 3 | Quartus Pro 26.1.1 | never | HDMI/DVI |
| Altera | Terasic | de2_115 | Cyclone IV E | Quartus 13.0sp1 through 25.1std | never | VGA |
| Altera | Terasic | terasic_sockit | Cyclone V | Quartus 13.0sp1 through 25.1std | never | VGA |
| Altera | ZEOWAA | zeowaa | Cyclone IV E | Quartus 13.0sp1 through 25.1std | never | VGA |
| Altera | unknown | emooc_cc | Cyclone IV E | Quartus 13.0sp1 through 25.1std | never | none |
| Altera | unknown | rzrd | Cyclone IV E | Quartus 13.0sp1 through 25.1std | never | VGA + LCD |
| Altera | unknown | saylinx | Cyclone IV E | Quartus 13.0sp1 through 25.1std | never | VGA |
| Gowin | Marsohod | marsohod3gw2 | GW1NR-9 | Gowin EDA, any version † | never | HDMI/DVI |
| Gowin | Sipeed | tang_mega_138k | GW5AST | Gowin EDA, 1.9.9 and newer † | always | HDMI/DVI + LCD |
| Gowin | Sipeed | tang_mega_138k_pro | GW5AST-138 | Gowin EDA, any version † | always | HDMI/DVI + LCD |
| Gowin | Sipeed | tang_nano_20k | GW2AR-18 | Gowin EDA, any version † | always | HDMI/DVI + LCD |
| Gowin | Sipeed | tang_nano_4k | GW1NSR-4 | Gowin EDA, any version † | always | HDMI/DVI |
| Gowin | Sipeed | tang_nano_9k | GW1NR-9 | Gowin EDA, any version; Yosys/OSS † | always | HDMI/DVI + LCD |
| Gowin | Sipeed | tang_primer_20k_dock | GW2A-18C | Gowin EDA, any version; Yosys/OSS † | always | HDMI/DVI + LCD |
| Gowin | Sipeed | tang_primer_20k_lite | GW2A-18 | Gowin EDA, any version † | always | none |
| Gowin | Sipeed | tang_primer_25k | GW5A | Gowin EDA, 1.9.9 and newer † | always | HDMI/DVI + VGA |
| Gowin | Xunlong | orangepi_msoc | GW5AT-138B | Gowin EDA, any version † | always | none |
| Lattice | 1BitSquared | icebreaker | iCE40 | no toolchain assigned; Yosys/OSS † | either | HDMI/DVI |
| Lattice | Colorlight | colorlight75b | ECP5 | Yosys/OSS † | always | none |
| Lattice | Colorlight | colorlightI5 | ECP5 | Yosys/OSS † | always | none |
| Lattice | Fabmicro | karnix | ECP5 | Yosys/OSS † | always | none |
| Lattice | Greg Davill | orangecrab | ECP5 | Yosys/OSS † | always | none |
| Lattice | Olimex | ice40hx8k_evb | iCE40 | Yosys/OSS † | always | VGA |
| Xilinx | ALINX | alinx_ax7035b | Artix-7 | Vivado, any version † | never | none |
| Xilinx | Digilent | arty_a7_100 | Artix-7 | Vivado, any version † | never | none |
| Xilinx | Digilent | arty_a7_35 | Artix-7 | Vivado, any version † | never | none |
| Xilinx | Digilent | basys3 | Artix-7 | Vivado, any version † | never | VGA |
| Xilinx | Digilent | cmod_s7 | Spartan-7 | Vivado, any version † | never | none |
| Xilinx | Digilent | eclypse_z7 | Zynq-7000 | Vivado, any version † | always | none |
| Xilinx | Digilent | nexys4 | Artix-7 | Vivado, any version † | never | VGA |
| Xilinx | Digilent | nexys4_ddr | Artix-7 | Vivado, any version † | never | none |
| Xilinx | Digilent | nexys_a7_100 | Artix-7 | Vivado, any version † | never | none |
| Xilinx | Digilent | nexys_a7_50 | Artix-7 | Vivado, any version † | never | none |
| Xilinx | Digilent | zybo_z7 | Zynq-7000 | Vivado, any version † | never | none |
| Xilinx | QMTech | qmtech_kintex_7 | Kintex-7 | Vivado, any version † | never | none |
| Xilinx | unknown | a7_lite_35t | Artix-7 | Vivado, any version † | always | HDMI/DVI |
About the columns:
- Toolchain with acceptable versions. The Quartus ranges were measured: each installed version was asked whether it can build for that particular part. A dagger (†) marks a range with one unverified bound — for instance the lower bound of 14.0.2 for MAX 10. For Vivado, Gowin EDA and the open-source flow the repository records no version requirement.
- TM1638. "Always" means the board wrapper always uses the TM1638 keypad-and-display module; "never" means it does not; "either" means the repository has configurations both with and without it.
- Graphics wired. What the board wrapper actually connects, not what the board itself is capable of.
The same board appears in the repository in several configurations — with
and without the TM1638 module, with HDMI or with one of the LCD screens, with
the vendor toolchain or with the open-source flow. In total there are 112
directories under boards/ for those 54 boards.
3.1. Three cases where the Quartus version is critical
For most boards any recent Quartus Lite will do. But there are three exceptions that make "just install the newest version" the wrong advice:
| Boards | Chip | What to install | Why |
|---|---|---|---|
| Terasic DE1, DE2 | Cyclone II | Quartus II 13.0sp1 | Version 13.1 already dropped Cyclone II |
| Terasic DE0, Marsohod MCY316, DK-DEV-3C120N | Cyclone III | Quartus II 13.1 (or 13.0sp1) | Version 21.1 and newer no longer support Cyclone III |
| Terasic DE23-Lite | Agilex 3 | Quartus Prime Pro + a free licence | No Lite edition can build for this chip |
Several versions of Quartus can live on the same machine at once without interfering. The scripts pick the one that suits the selected board — see section 4.1.1.4. That is exactly why, for an old board, it is convenient to install 13.0sp1 or 13.1 alongside a recent Quartus Lite rather than instead of it.
The Marsohod MCY112 board is built on a
first-generation Cyclone (EP1C12). None of the versions tested — from 13.0sp1
through 25.1std and Pro 26.1.1 — can build for it: all of them report
Error (20005) saying a licence is required. The board's own
project file in the repository was created by Quartus II 9.1 SP2 Web, that is
by a free edition. This board needs a Quartus of that generation, or a
licence.
top ↑4. Installing the toolchains and the supporting software
The order of the sections is Windows (4.1), Linux (4.2), macOS (4.3). Inside each one, the same tools appear in the same order.
What is mandatory and what is not. Git, Icarus Verilog with a waveform viewer, VS Code and RARS are mandatory — without them no lab exercise can be done. Of the FPGA toolchains you only need the one that matches your board: Quartus for an Altera board, Vivado for Xilinx, Gowin EDA or OSS CAD Suite for Gowin, OSS CAD Suite for Lattice. If you have no board at all, you need none of them: the examples can be simulated in Icarus Verilog, and the SVH exercises are done entirely without a board.
In every case the installation path must contain no spaces and no non-Latin characters. This applies to all of the programs listed here and is the single most common cause of inexplicable failures.
4.1. Windows 10 and 11
4.1.1. Installing Quartus (for boards with Altera FPGAs)
Quartus is only needed for boards with Altera FPGAs (formerly branded Intel). If your board uses Xilinx, Gowin or Lattice, skip sections 4.1.1–4.1.3.
Intel is Altera again. New versions install
into altera_lite (the Lite edition) and altera_pro
(the Pro edition), whereas the Intel-era versions installed into
intelFPGA_lite and intelFPGA. The repository scripts
know all of these names, so the choice does not matter — install into whatever
directory the installer offers.
Which version to choose
- Quartus Prime Lite 21.1 — the version the School's lab exercises are written for, and the one this manual walks through step by step. It covers every board with a Cyclone IV, Cyclone V, MAX II or MAX 10 chip.
- Quartus Prime Lite 25.1 and other recent versions are
equally suitable for the same boards. They install into
altera_lite. - Quartus II 13.0sp1 or 13.1 — in addition, if your board uses a Cyclone II or Cyclone III (see 3.1).
- Quartus Prime Pro — only for the DE23-Lite.
4.1.1.1. Installing Quartus Prime Lite 21.1 step by step
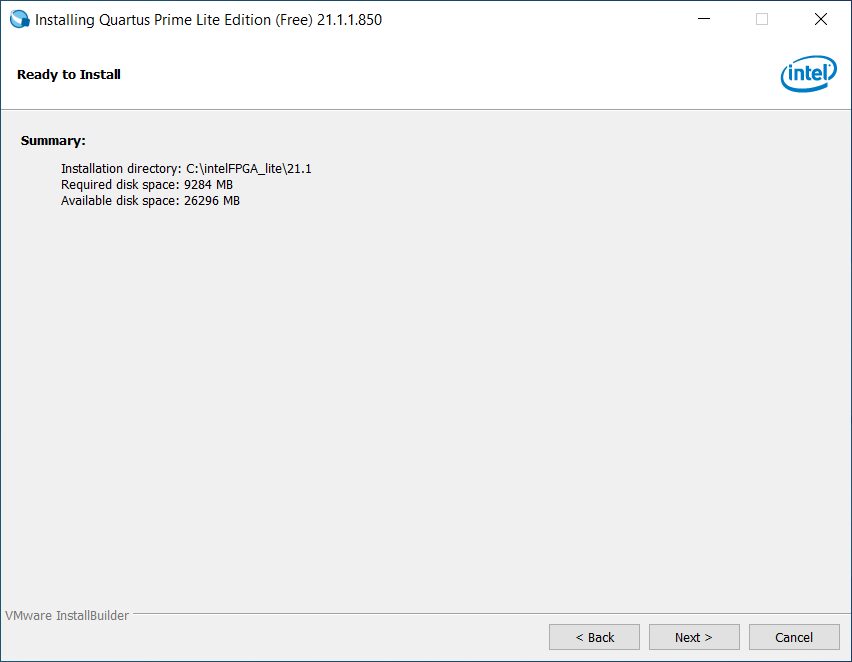
1. Make sure you have downloaded both files: the installer
(QuartusLiteSetup-21.1.exe) and the device support archive for
your chip, with the .qdz extension. Both files must sit
in the same folder.
Which .qdz you need is determined by the chip on the board:
| Board | Chip | Device support file |
|---|---|---|
| DE10-Lite | MAX 10 | max10-21.1.1.850.qdz |
| DE10-Nano, DE1-SoC, DE0-CV | Cyclone V | cyclonev-21.1.1.850.qdz |
| OMDAZZ, RzRd, ZEOWAA, DE2-115, DE0-Nano | Cyclone IV | cyclone-21.1.1.850.qdz |
The part number is printed on the chip package on the board itself; it is also in the "FPGA family" column of the table in section 3.
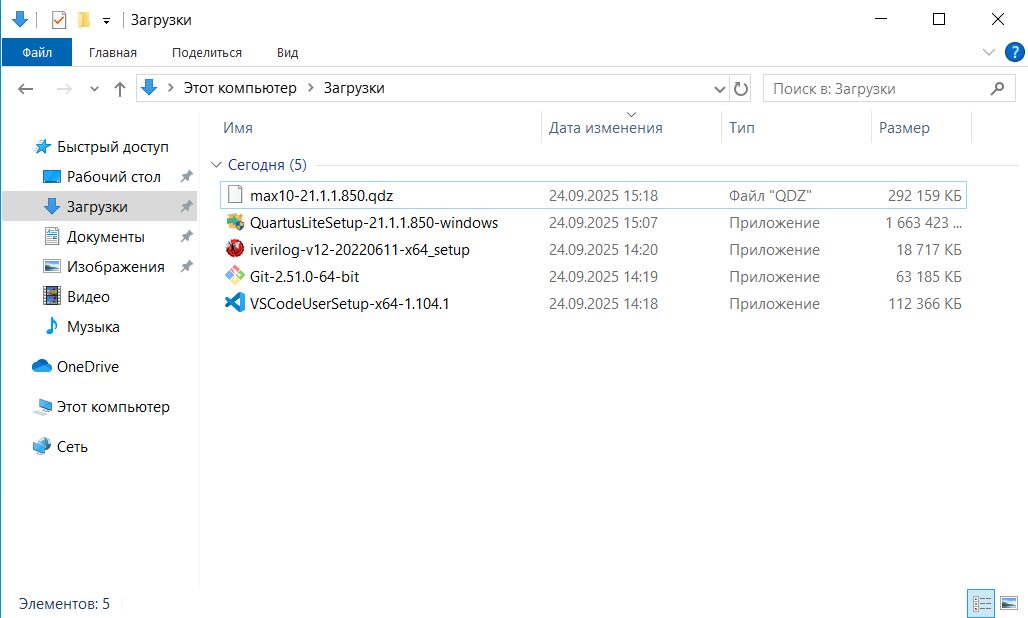
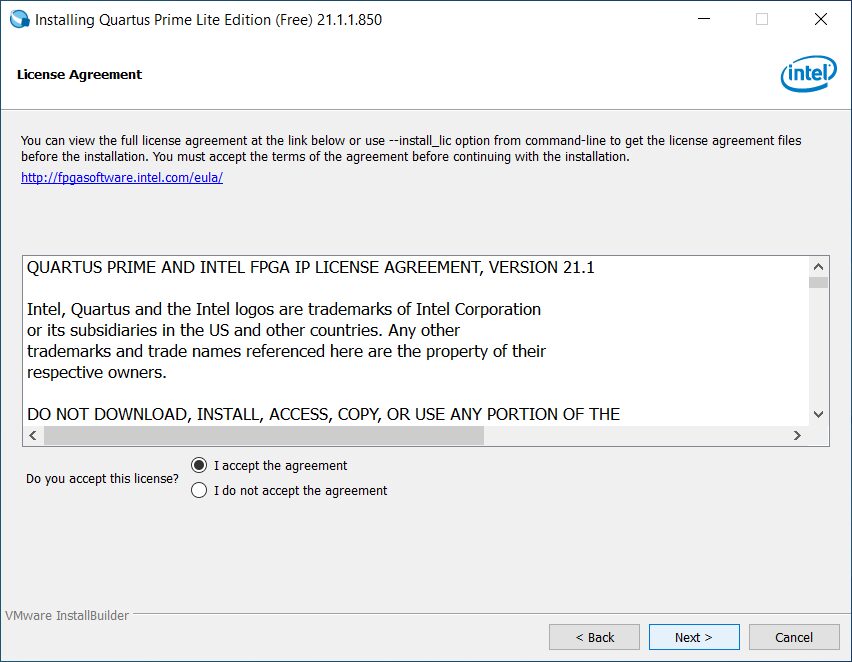
2. Run the installer and accept the licence agreement.
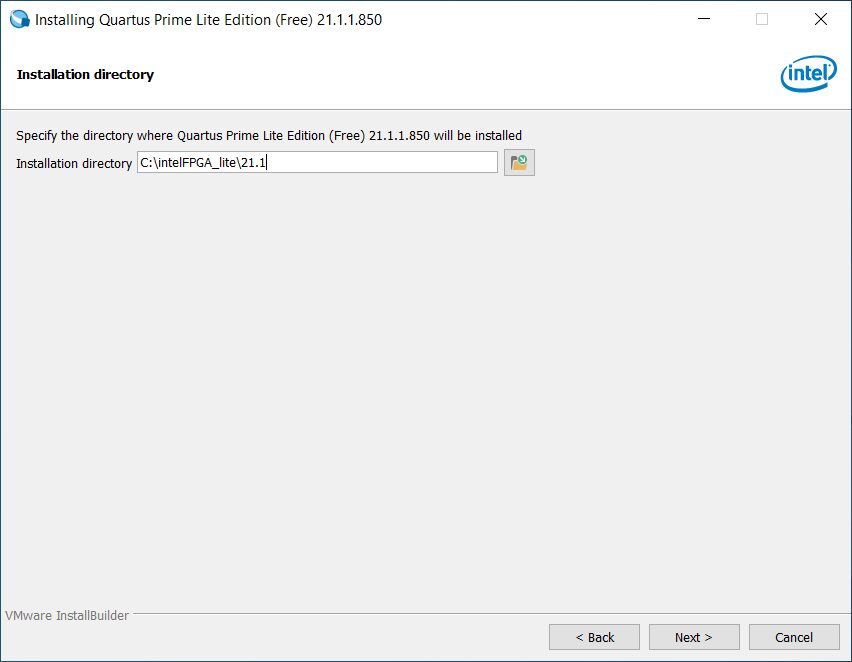
3. Leave the installation path at its default.
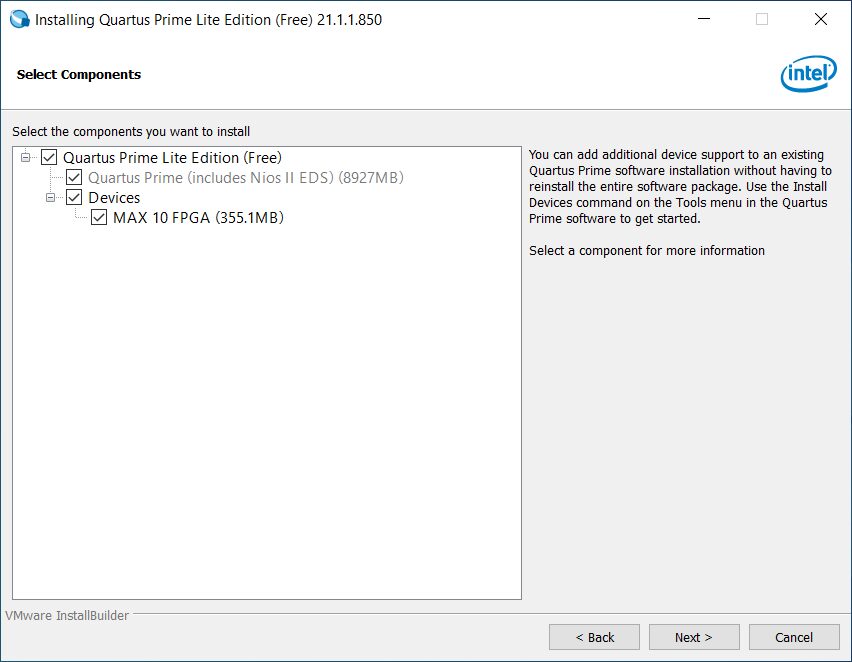
4. If the .qdz file was next to the installer,
your chip now appears in the Devices list. If there are several files,
tick only the family you need — the others take up space for nothing.
5. Press Next and wait for the installation to finish.
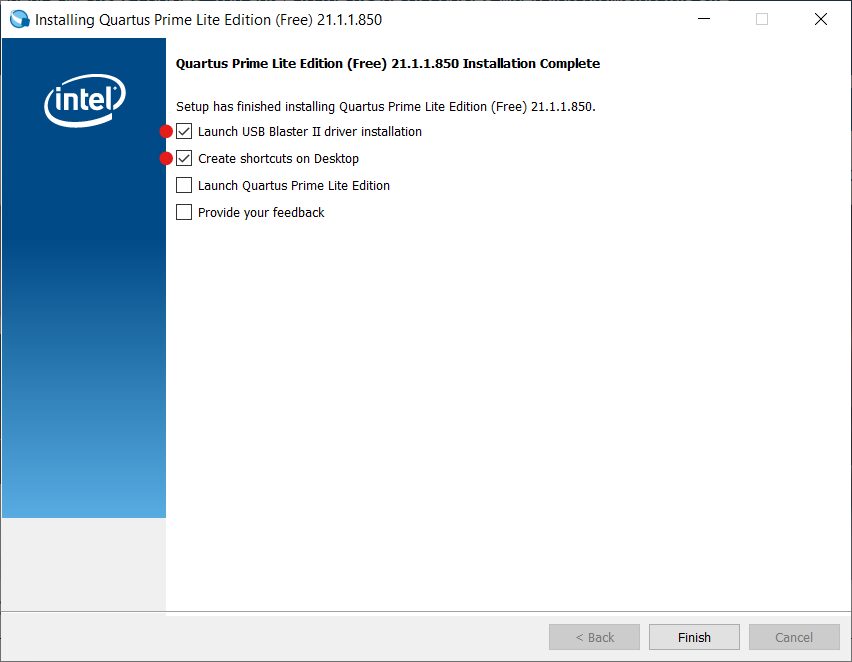
6. On the last screen make sure to tick Launch USB Blaster II driver installation, then press Finish.
You do not need to set environment
variables or PATH afterwards. How the scripts find Quartus is
explained in section 4.1.1.4.
4.1.1.2. Installing the USB Blaster driver
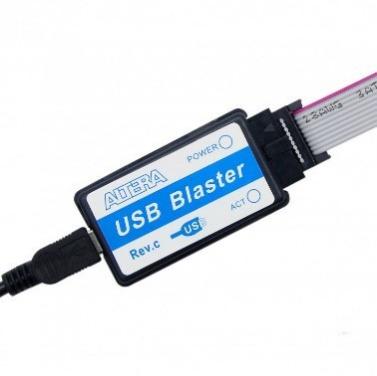
Programming a board needs the driver for the programmer. The example below uses an OMDAZZ/RzRd board with a DDS2022-24 programmer.
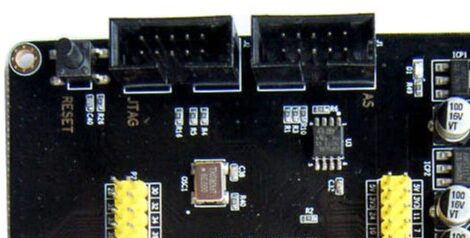
1. Connect the programmer. Plug one end of the JTAG ribbon cable into the JTAG connector on the board (not AS!) and the other end into the programmer. Mind the notch in the connector: the cable only goes in one way round.
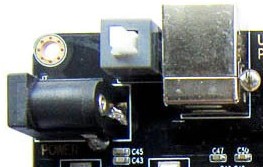
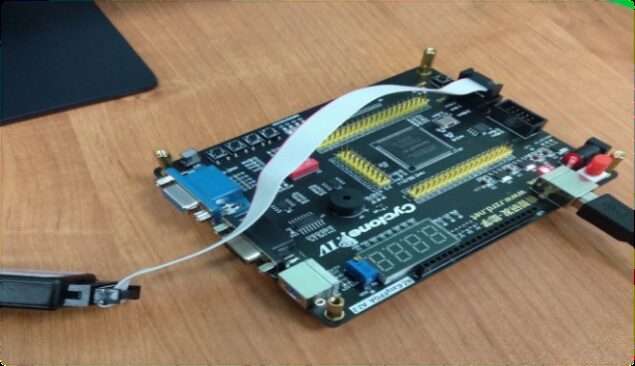
2. Power the board through the USB B-type cable and switch it on with the button next to the connector. A board that is ready to work looks like this:
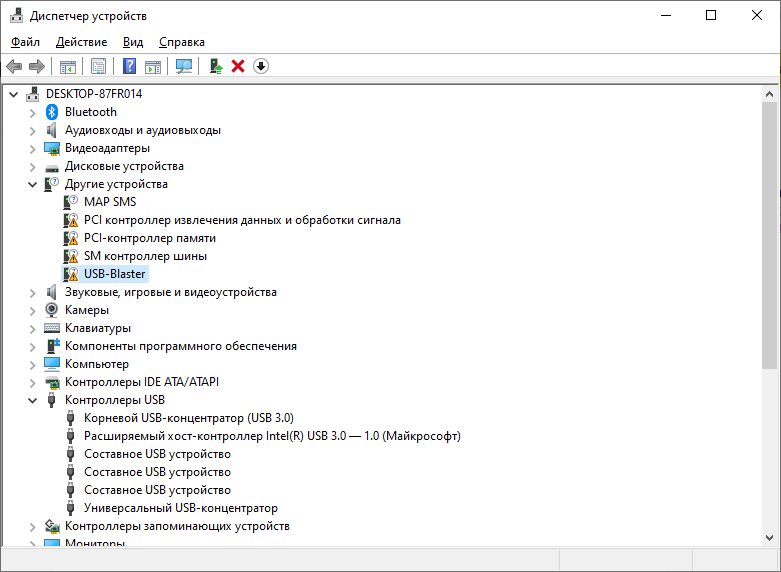
3. Open Device Manager (the quickest way is the search box next to the Start button). A new device appears in the list once the programmer is connected.
4. Right-click it → Update driver → Browse my computer for drivers.
5. Point the search at the Quartus installation directory.
The driver lives inside it, under
quartus/drivers/usb-blaster.
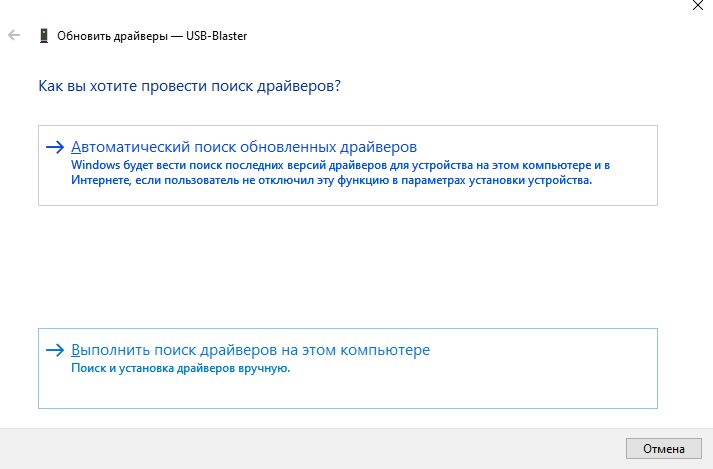
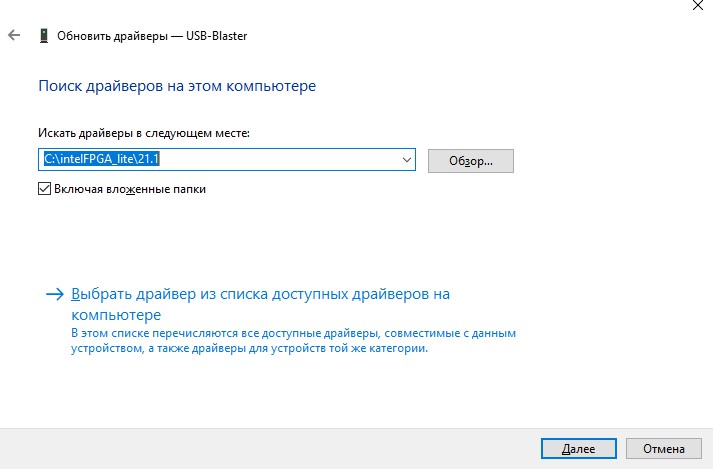
If no device appears in Device Manager: try another USB socket (including a USB 2.0 one instead of 3.0 — not all of them work), check the JTAG connection, and check that the LED on the programmer is lit. If every segment of the OMDAZZ seven-segment display lights up at once, the board is faulty. If nothing helps, write to the School's moderators.
USB Blaster III. Programmer generations have
different USB identifiers and need their own driver. Boards with a USB Blaster
III — the DE23-Lite among them — use product id 6022. Under
Windows the driver installs the same way, from the Quartus directory; under
Linux a udev rule is needed, see section 4.2.1.2.
4.1.1.3. Checking the Quartus installation
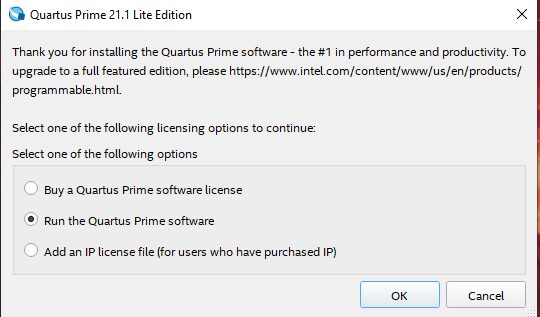
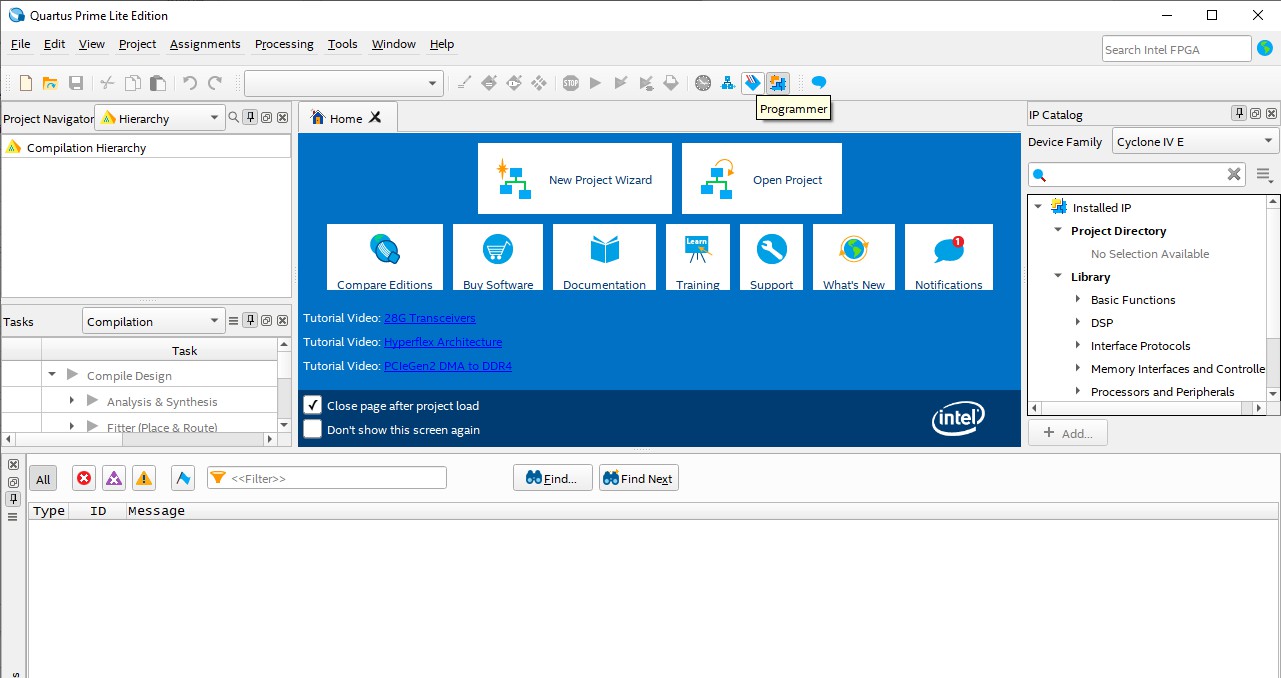
1. Start Quartus. A chooser window appears; press Run the Quartus Prime Software.
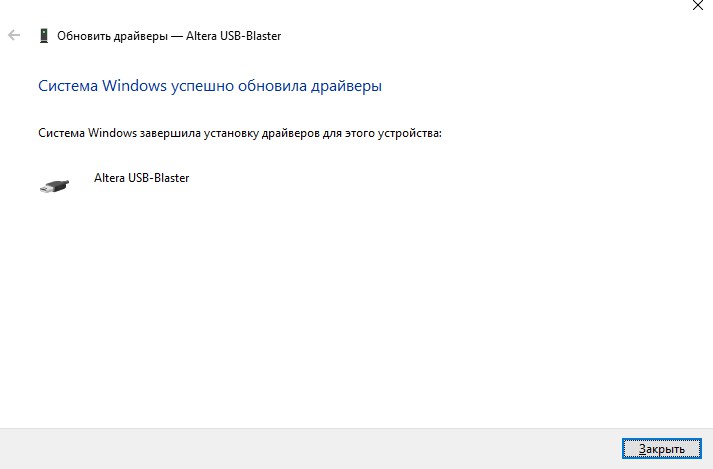
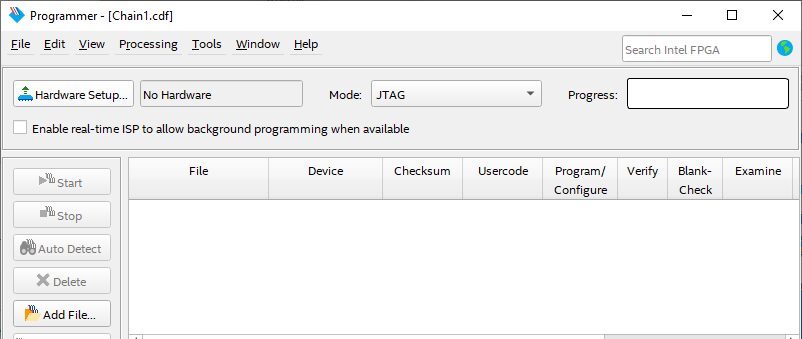
2. If you have a board, open the Programmer window.
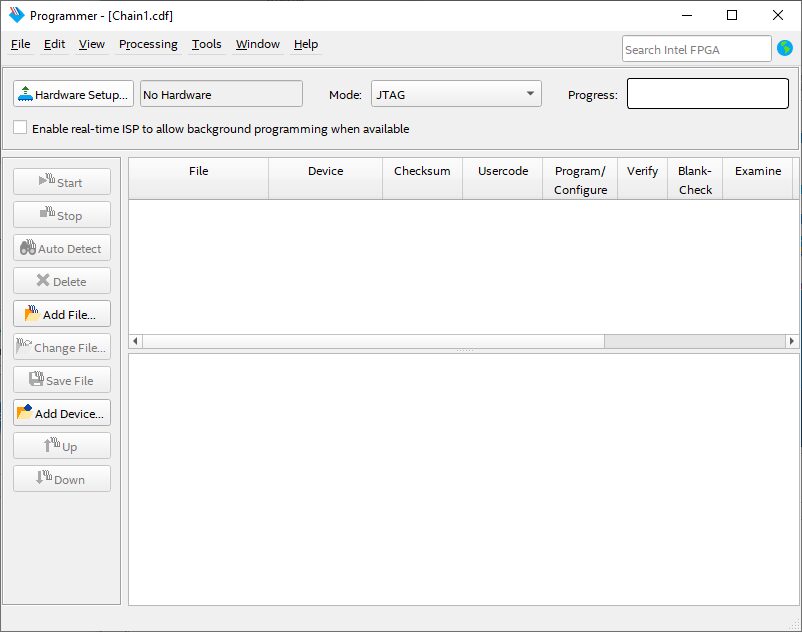
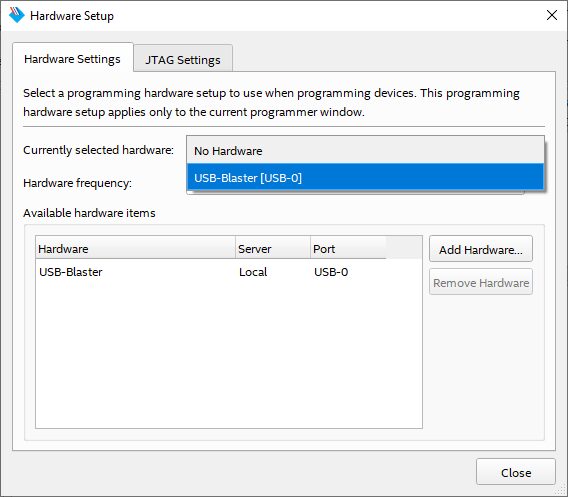
3. Press Hardware Setup.
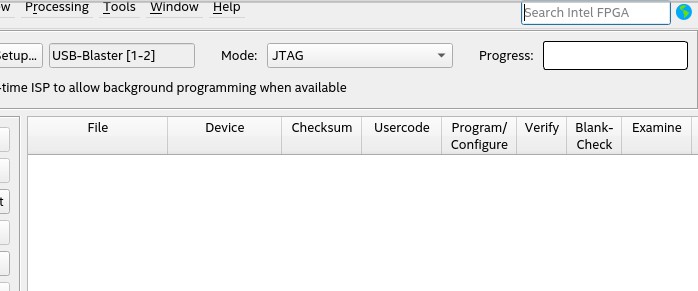
4. If the drop-down list contains USB-Blaster, the driver is installed correctly.
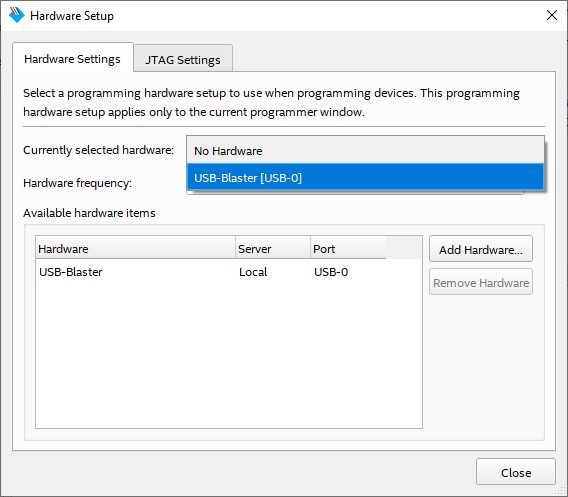
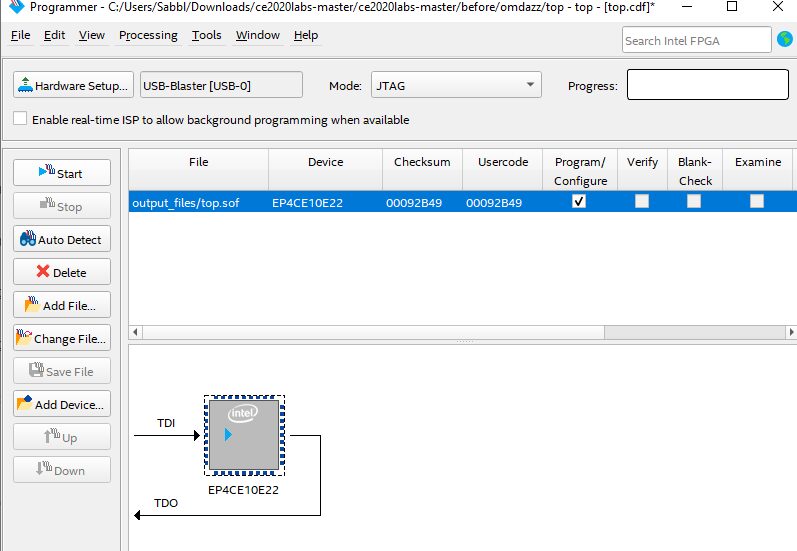
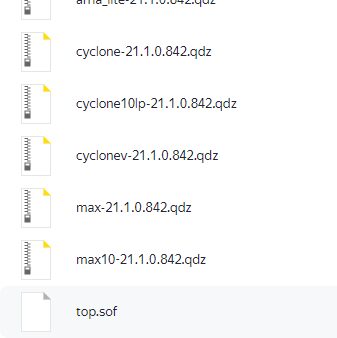
5. Use Add File to add a ready-made
.sof bitstream and press Start. The word
Successful means that both Quartus and the programmer work.

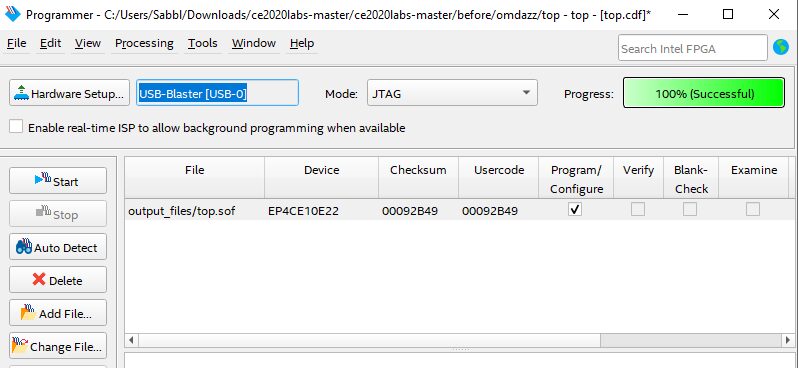
You do not have to download a separate bitstream for this
check: building any example in the repository with
03_synthesize_for_fpga.bash both builds it and programs the board.
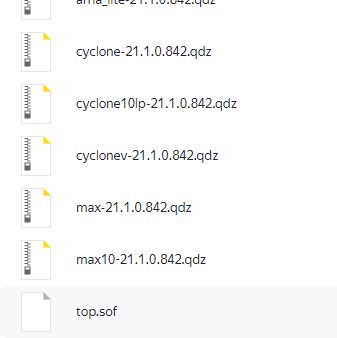
The previous edition suggested downloading top.sof from a cloud
drive; that still works but is not necessary.
The Programmer window after a successful run
4.1.1.4. How the BGM scripts find Quartus
In BGM, synthesis, programming the board and opening the vendor GUI are done by the same scripts for every toolchain:
./03_synthesize_for_fpga.bash          # synthesise and program the board
./04_configure_fpga.bash               # program only
./05_run_gui_for_fpga_synthesis.bash   # open the GUI
Finding Quartus is the job of
scripts/steps/00_setup_altera.source_bash. The order of the search
is as follows, and the first step that succeeds stops the search:
QUARTUS_ROOTDIR— if the variable is set and points at thequartusdirectory inside an installation, that installation is used and no search happens at all.quartusonPATH— if it is already available and suitable for your board, the script changes nothing.INTEL_FPGA_HOME, thenALTERA_HOME, thenQUARTUS_HOME— a directory that contains installation directories.- Standard locations: the home directory,
/optand/tools(under Windows, the drive roots/c,/dand/e).
In each of those locations, every directory name the Altera and Intel installers have used over the years is checked:
altera  altera_lite  altera_std  altera_pro
intelFPGA intelFPGA_lite intelFPGA_std intelFPGA_proSetting PATH is not
required. The previous edition of the manual told you to add
QUARTUS_ROOTDIR, QSYS_ROOTDIR and PATH
to ~/.bashrc. That is no longer necessary: for an installation in
a standard location the scripts find Quartus themselves. The variables remain
useful in two cases — when the installation lives somewhere unusual, and when
you have several versions and want to force one of them.
A directory name tells you nothing about either the version
or the edition. On the developer's machine
altera_lite/25.1std holds a Lite edition while
altera/13.1 holds a Web edition (the former name of Lite). So the
script does not trust names: it runs quartus_sh and asks the tool
itself for its version, its edition and the list of devices it can build
for.
The script then reads the actual part number out of your board's project
file (boards/<board>/board_specific.qsf) and keeps only the
installations that support it. Among those, the choice is made in this
order:
- a free edition (Lite or Web) wins over a paid one, even if it is older;
- then the newer version wins;
- Standard wins over Pro — but only at equal versions.
Interrogating an installation takes one to five
seconds, so the answer is cached in
~/.cache/basics-graphics-music and keyed to the timestamp of the
quartus_sh file. An ordinary lab run does not spend that
time.
If no installation can build for your board's chip, the script says so
immediately, naming the chip and listing the versions it found — instead of
picking an unsuitable one and failing later in the middle of synthesis. If you
pointed at an installation yourself, through QUARTUS_ROOTDIR or
through INTEL_FPGA_HOME / ALTERA_HOME /
QUARTUS_HOME, the script trusts you: it prints a warning and
carries on.
4.1.2. Installing AMD Vivado (for boards with Xilinx FPGAs)
Vivado is only needed for boards with AMD Xilinx FPGAs. Boards with Altera, Gowin or Lattice chips do not need it.
The Vivado installer image is over 80 GB and the installed program takes over 50 GB. Check your free space in advance.
The lab exercises are written for version 2022.2. The School's community has verified that they also work on 2018, 2021 and 2023, but 2022.2 is the recommended one.
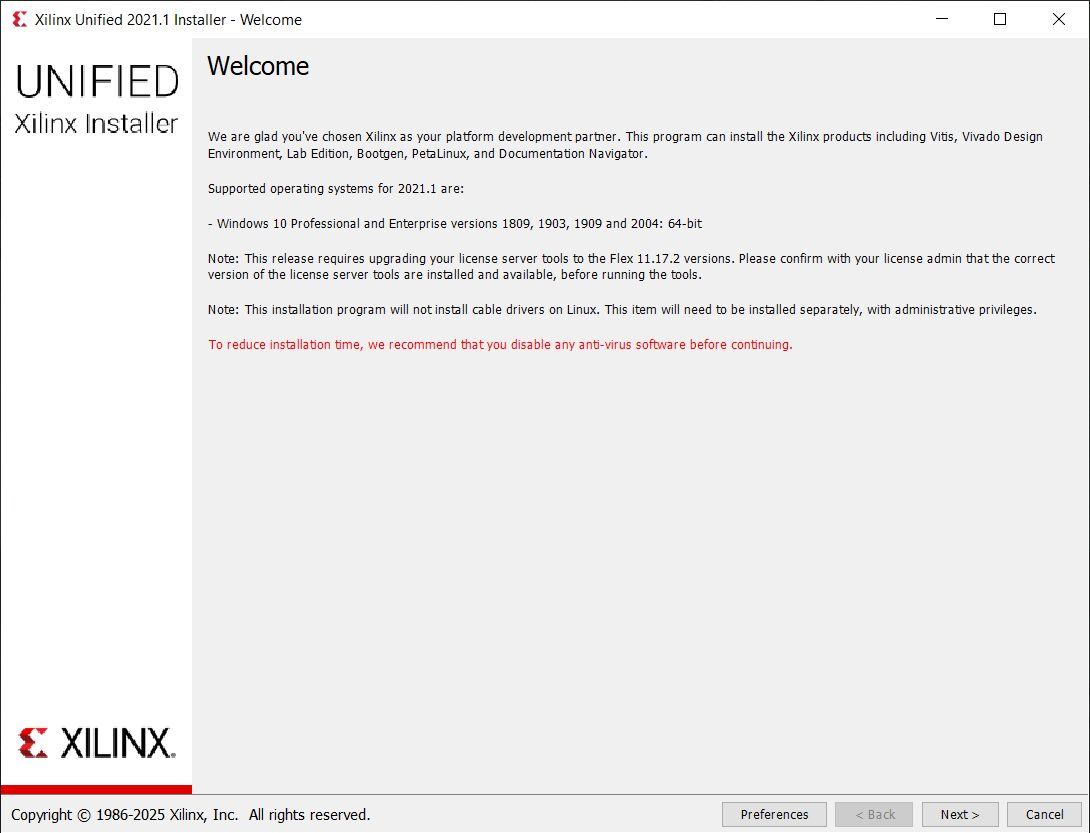
1. Press Next on the installer's welcome screen.
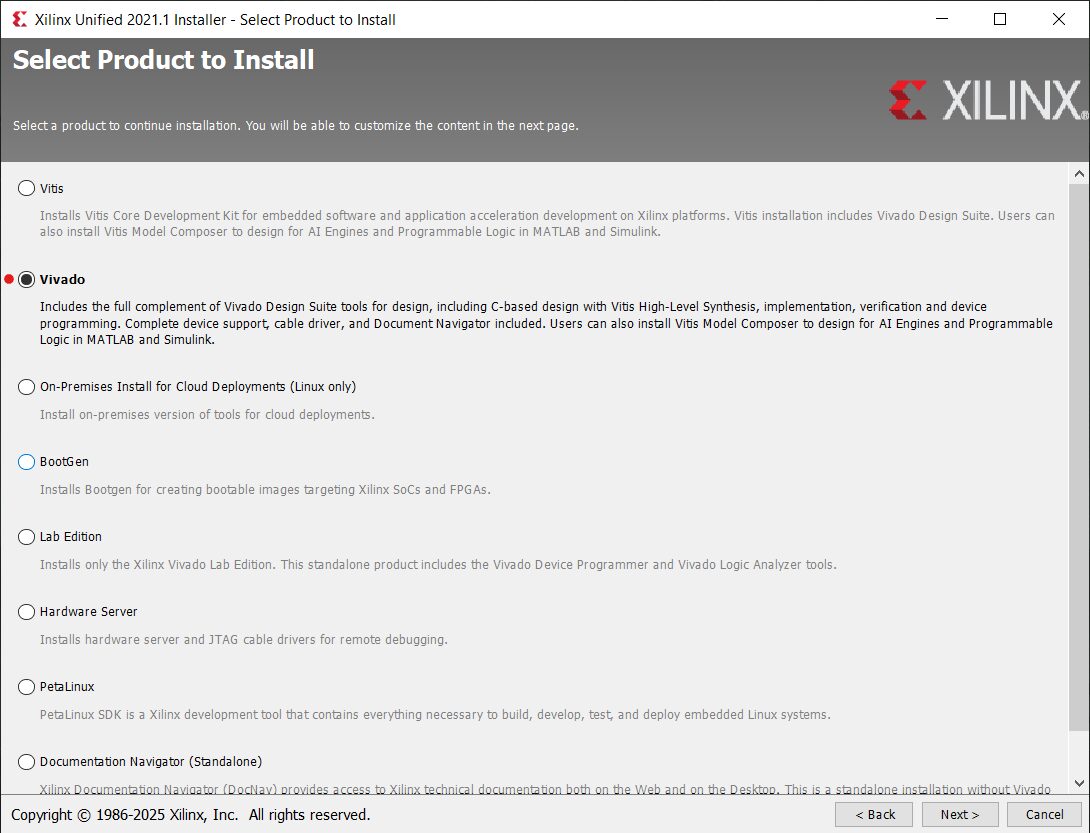
2. Tick Vivado.
3. On the Product Devices page, tick the device families the repository supports: Zynq-7000, Artix-7, Kintex-7 and Spartan-7. The other families take up tens of gigabytes for nothing.
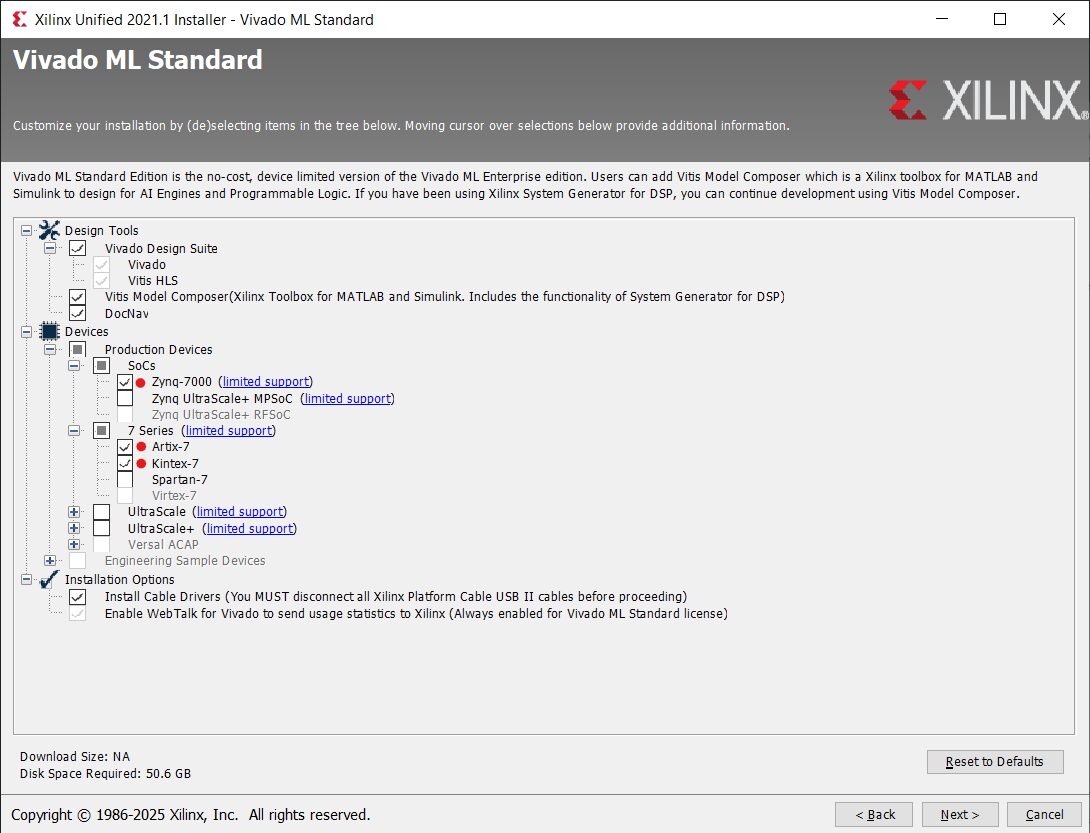
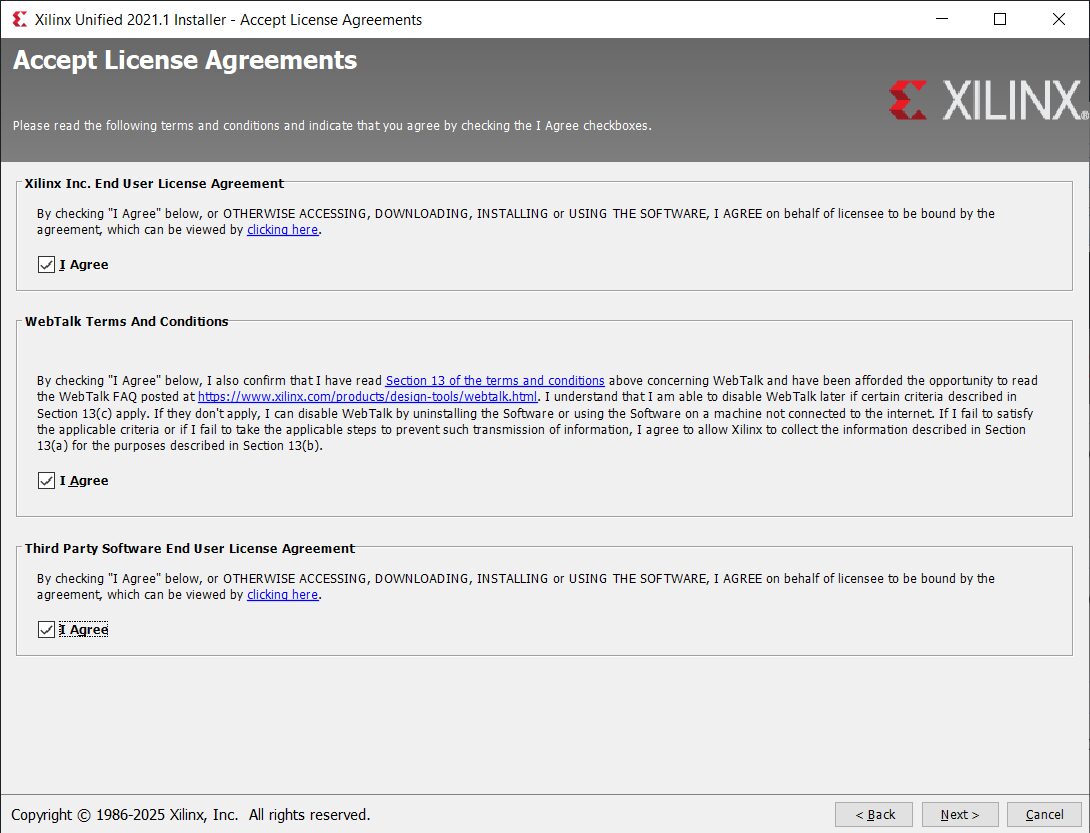
4. Accept the licence agreement, leave the installation path at its default and press Install.
The previous edition named only Zynq-7000, Artix-7 and Kintex-7. The repository now also has Spartan-7 boards (the Digilent Cmod S7, for instance), so that family is worth ticking too.
How the BGM scripts find Vivado
The search is done by
scripts/steps/00_setup_xilinx.source_bash. In spirit the order is
the same as for Quartus:
XILINX_VIVADO— a direct pointer to one version's directory;vivadoonPATH;XILINX_HOME— a directory that contains installations;- standard locations: the home directory,
/opt,/tools; under Windows/c,/d,/e.
Inside each location the directories Xilinx,
AMD and AMDDesignTools are checked, in two different
layouts:
<location>/<vendor>/Vivado/<version>   — Vivado 2024.1 and older
<location>/<vendor>/<version>/Vivado — Vivado 2024.2 and newerStarting with release 2024.2, AMD changed the directory
layout: the version number now sits above the product name, and the
vendor directory is no longer necessarily called Xilinx. Earlier
versions of the scripts failed to find Vivado because of this; both layouts are
now supported.
If several installations are found, the newest version is used. There is no
need to set PATH.
The repository contains its own illustrated Vivado installation guide: docs/vivado_installation_guide.
4.1.3. Installing Gowin EDA (for boards with Gowin FPGAs)
Why Gowin boards are convenient for teaching
- Synthesis speed. An example builds in seconds rather than minutes — which matters in a classroom: the student gets several attempts within one session.
- All three operating systems. Gowin EDA runs under Windows, Linux and macOS. By comparison, Quartus and Vivado are not released for macOS at all.
- Price and bundle. A Tang Nano 9K with an LCD screen and the sound modules comes to roughly 60 dollars per student — cheaper than any Altera or Xilinx board of comparable capability.
- Room to grow. Example code moves to the Tang Primer 25K and Tang Mega 138K with practically no changes.
A detailed comparison: verilog-meetup.com — Can Gowin beat Xilinx and Altera in the educational market?
Installation
Downloading requires registration on the vendor's site. The School assumes version V1.9.9 Education.
For the Tang Primer 25K and Tang Mega 138K (the GW5A and GW5AST families) version 1.9.9 is not enough — those chips came later. Use a newer Gowin EDA.
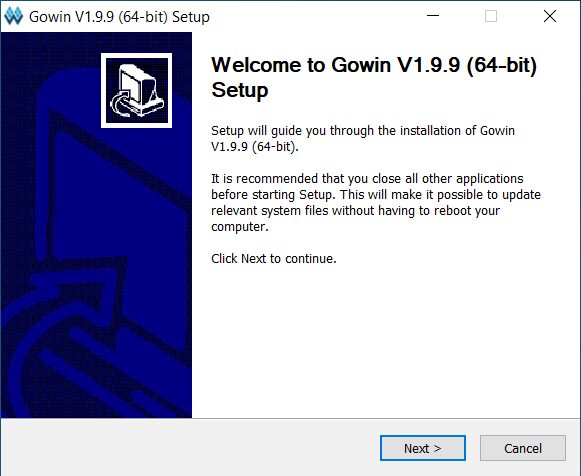
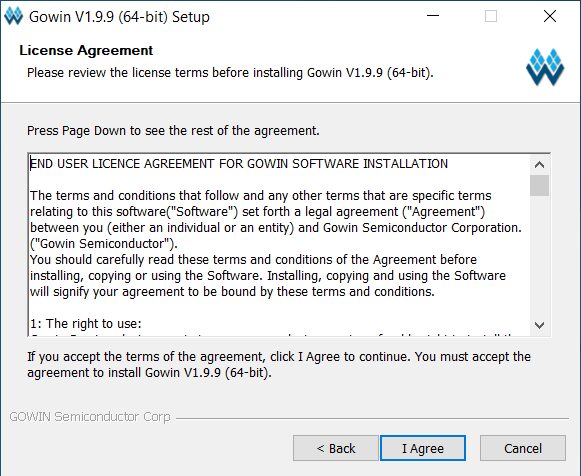
1–2. Press Next on the welcome screen and accept the licence agreement.
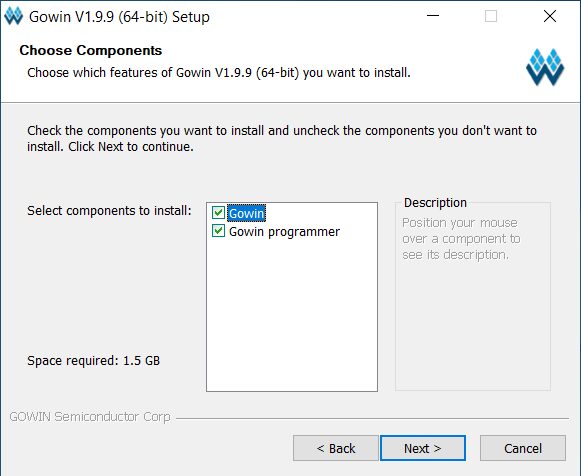
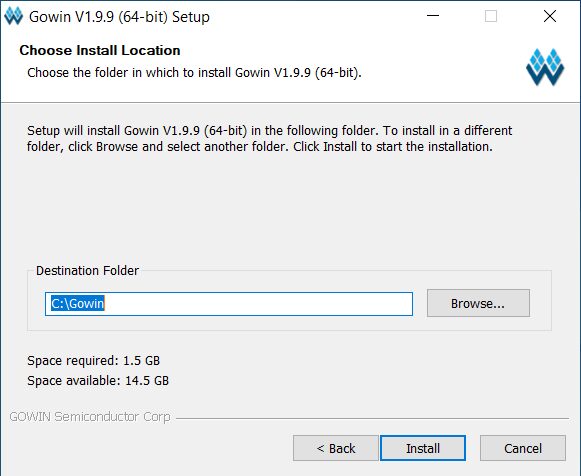
3–4. Tick every box so that all components are installed. Leave the path at its default and press Install.
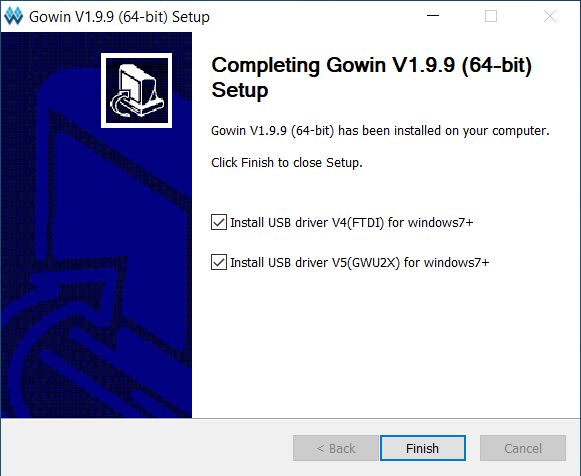
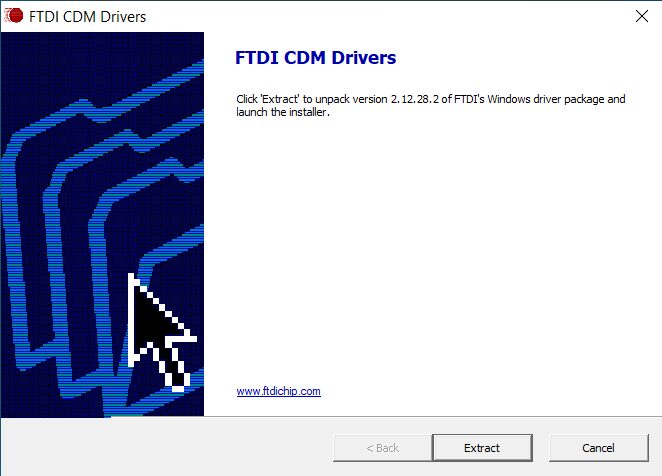
5–6. When it finishes, tick the programmer driver installation boxes and press Finish. In the FTDI CDM Drivers window press Extract.
7–9. Next → accept the agreement → wait → Finish.
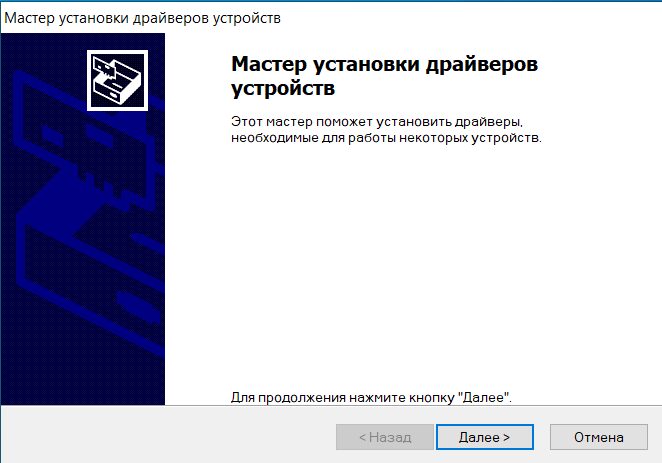
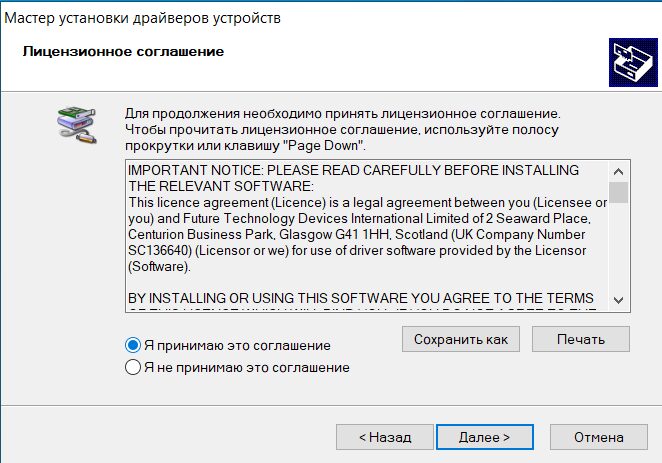
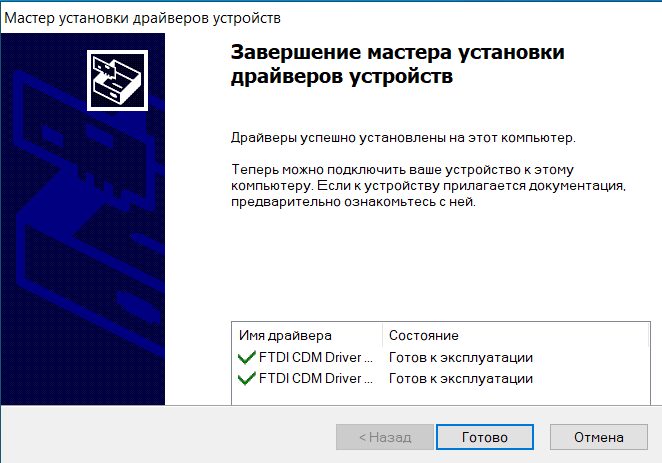
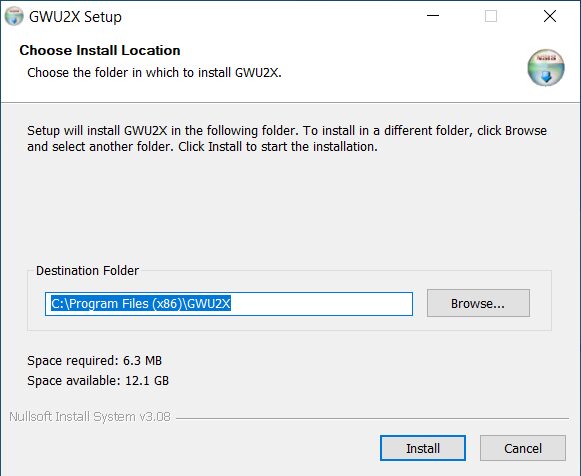
10–12. A shield icon starts blinking in the notification area — click it, leave the path at its default, Install, then Close.

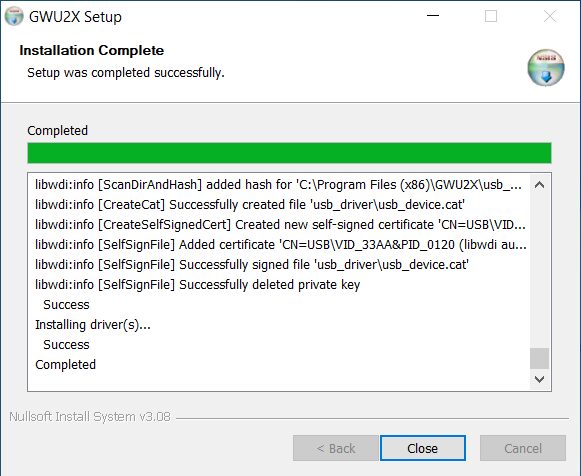
How the BGM scripts find Gowin EDA
scripts/steps/00_setup_gowin.source_bash checks:
GOWIN_VERSION_DIR— one version's directory (it must contain theIDEandProgrammersubdirectories);GOWIN_HOME— a directory that contains versions;- the home directory,
/opt,/tools, and within them the subdirectoriesGowinorgowin.
If several versions are found, the newest is used (directory names like
Gowin_V1.9.9 are sorted and the last one wins), and a warning
lists what was found.
4.1.4. OSS CAD Suite — the open-source flow for Gowin and Lattice
OSS CAD Suite is a single archive containing the whole open-source flow: Yosys (synthesis), nextpnr (place and route), openFPGALoader (programming), plus its own builds of Icarus Verilog, GTKWave and Verilator. It is the only way to work with Lattice boards (ECP5, iCE40), and an alternative way to work with Gowin boards.
Installation
- Download the archive for your system from the releases page: github.com/YosysHQ/oss-cad-suite-build/releases.
- Unpack it so that you end up with a
~/oss-cad-suitedirectory — that is, straight into your home directory. The BGM scripts look at exactly that path, and also at~/Downloads/oss-cad-suite.
Nothing else is needed: the script
scripts/steps/00_setup_yosys.source_bash finds the directory and
activates it with source ~/oss-cad-suite/environment. There is no
need to edit PATH by hand.
If the directory is absent, the script looks for yosys on the
system and, failing to find it, prints a message with a link to the releases
page.
The open-source flow moves quickly, and some examples in the repository do not yet work completely on it — particularly for Lattice boards. If you run into such an example, that is a good topic for independent work: the School counts on students helping to debug these cases. Report what you find through the repository's issues.
4.1.5. Installing Icarus Verilog and a waveform viewer (mandatory)
Icarus Verilog is an open-source simulator, sufficient for simulating every example in the repository. GTKWave or Surfer are the programs that display waveforms in VCD format.
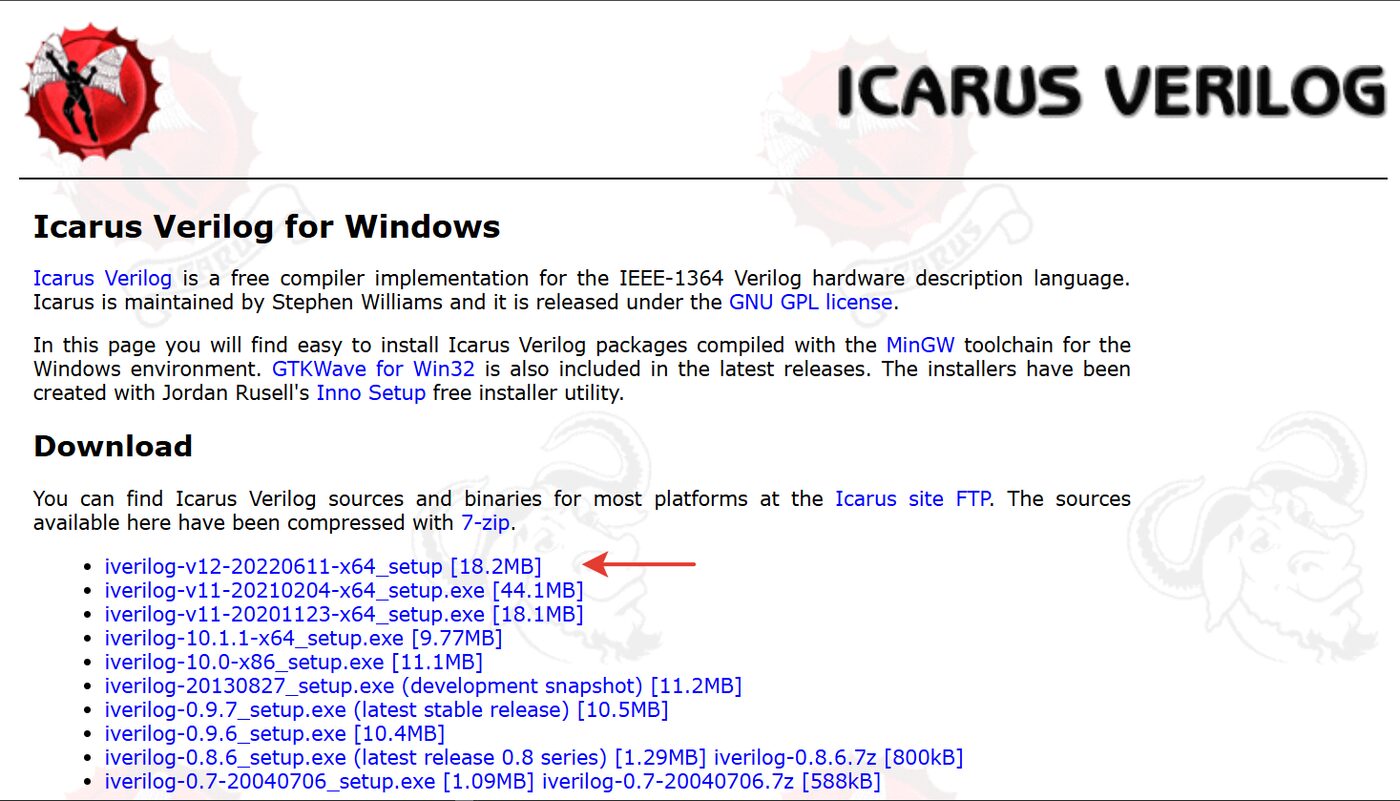
Version 13 is the minimum, 14 is better. The previous edition described version 12. The repository scripts check the version on startup: below 12 they report an error, and on 12 they print a warning recommending 13 or 14. Some examples use SystemVerilog constructs that only version 13 and newer understand.
Where to download: bleyer.org/icarus — builds for Windows. Take version 14.
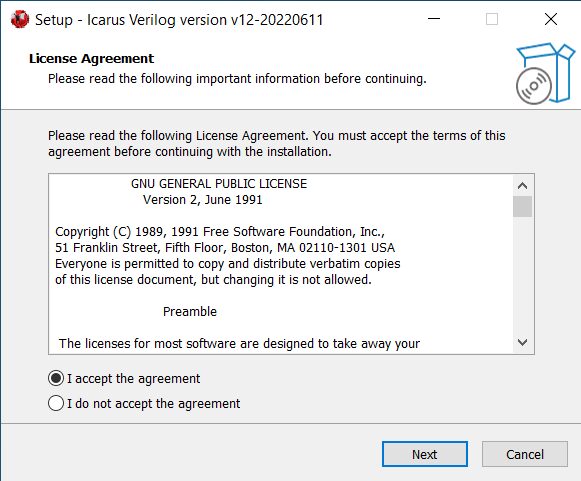
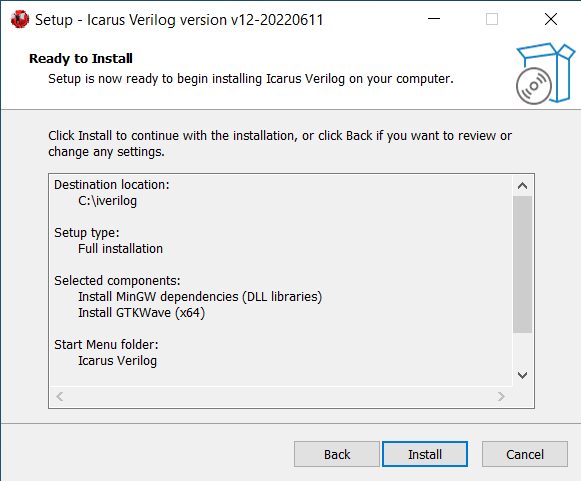
1–2. Run the installer and accept the licence agreement.
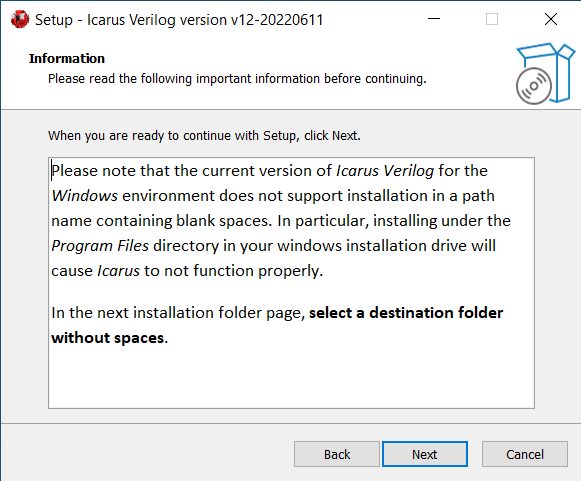
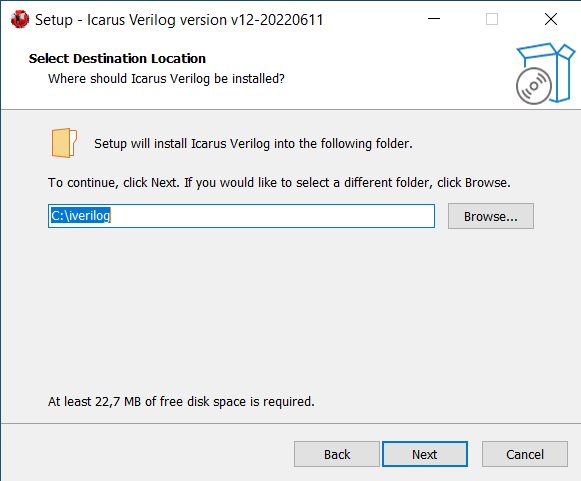
3–4. The installer warns that the installation path must
contain no spaces. Leave it at its default
(C:\iverilog).
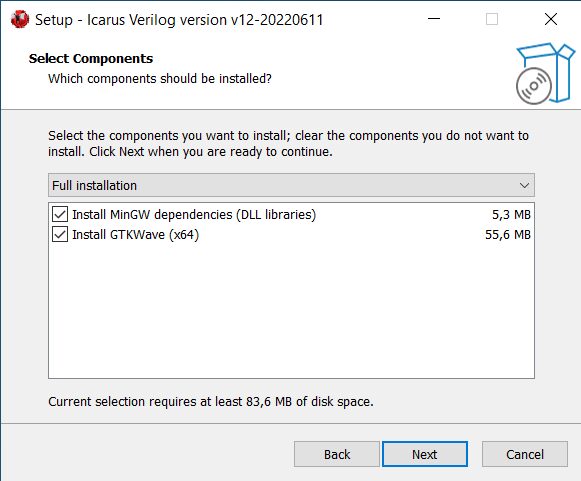
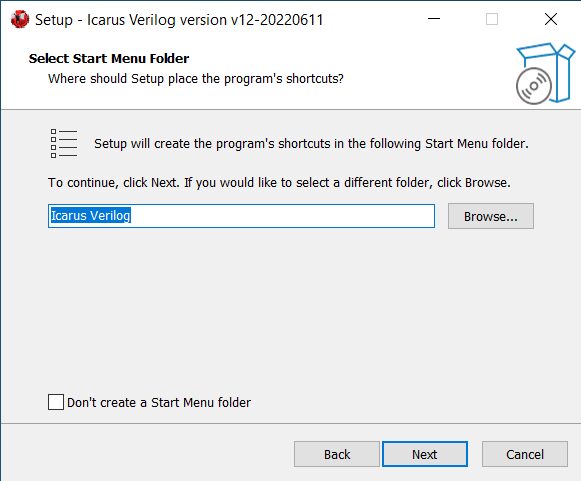
5–6. Tick both boxes for a full installation — it includes GTKWave. Leave the Start-menu folder name as it is.
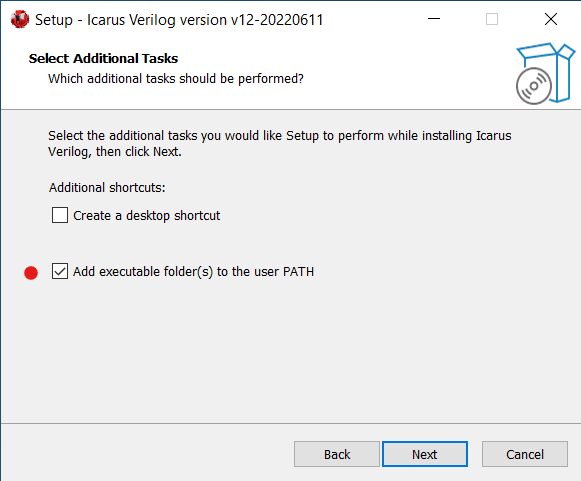
7–8. Tick Add executable folder(s) to the user PATH and press Install.
How the BGM scripts find Icarus
scripts/steps/00_setup_icarus.source_bash:
- if
iverilogis available onPATH, that one is used; - otherwise, under Windows
/c/iverilog(that isC:\iverilog) is checked, and under Linux and macOS~/install/iverilog; - the script then runs
iverilog -V, parses the version number and warns if it is too old; - it additionally checks for
-g2023support, which some examples need.
The Icarus inside OSS CAD Suite works too. If you installed OSS CAD Suite (section 4.1.4), a separate Icarus installation is optional: the archive contains both the simulator and GTKWave, and the scripts use them.
If a surfer program is found on the system instead of GTKWave,
the scripts use it and read the surfer.scr settings file instead
of gtkwave.tcl. See section 4.1.7.
4.1.6. Installing Visual Studio Code (mandatory)
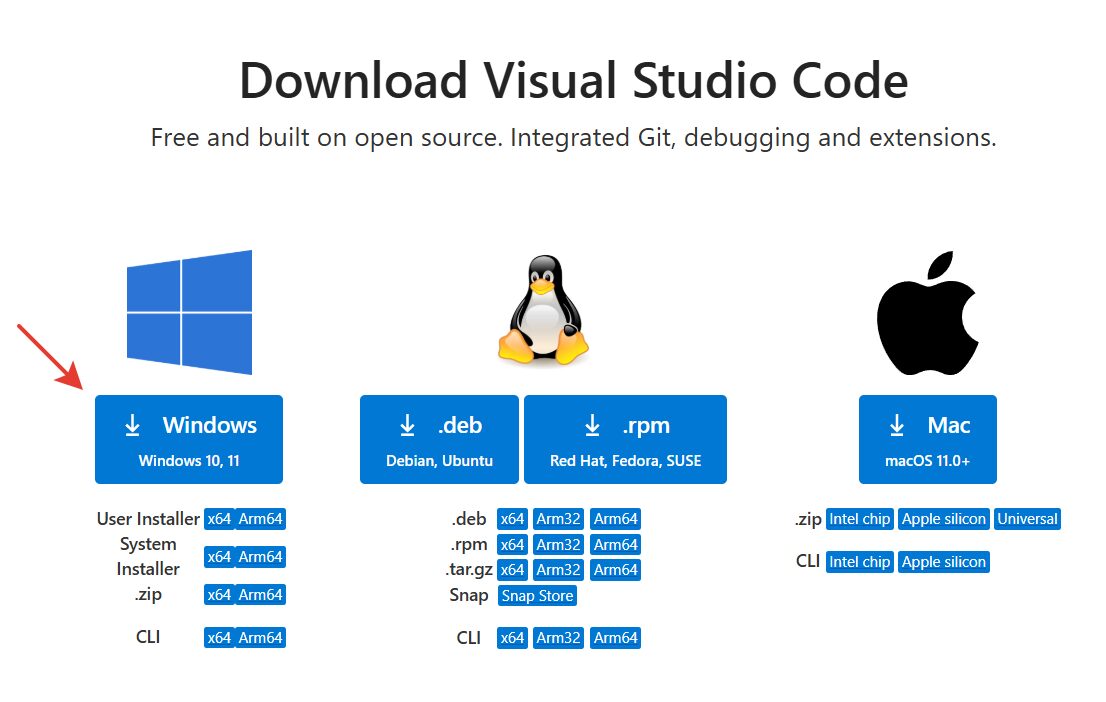
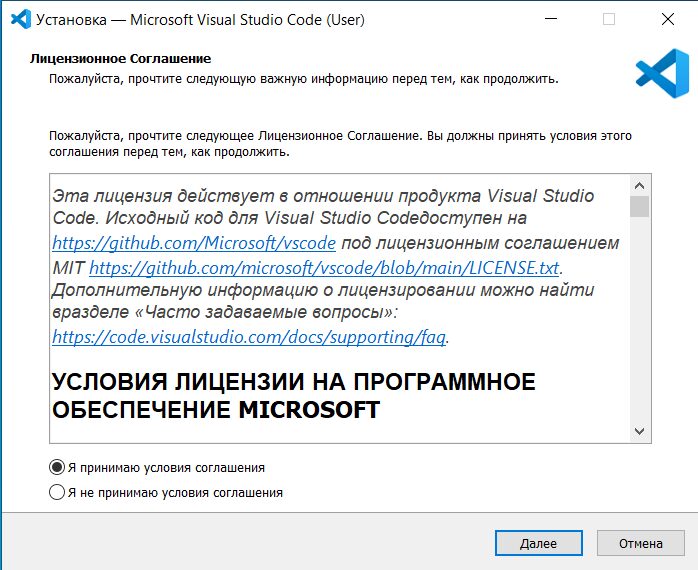
1–3. Download the installer from code.visualstudio.com, run it and accept the licence agreement.
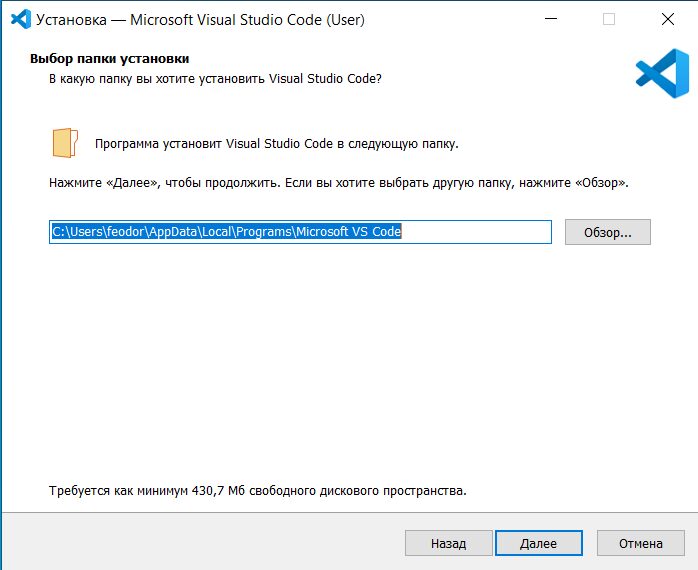
4–5. Leave the installation path at its default. The path must contain no non-Latin characters. Leave the Start-menu folder name as it is.
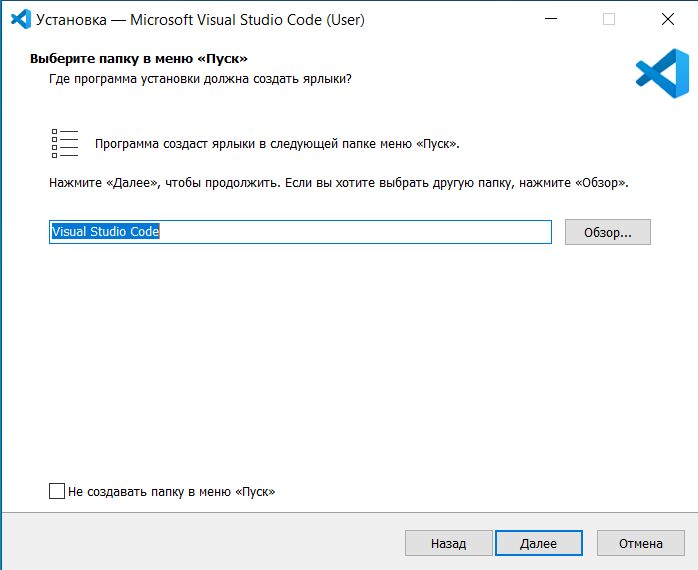
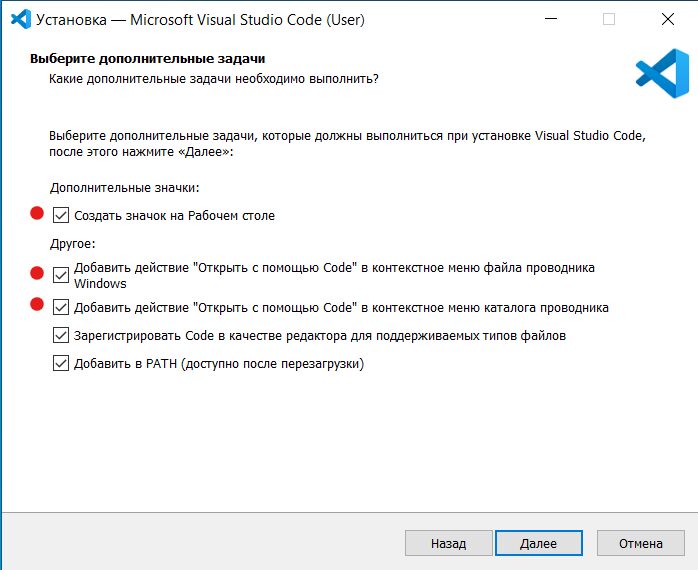
6–7. It is worth ticking "Create a desktop icon" and both "Open with Code" entries — they add the command to Explorer's context menu.
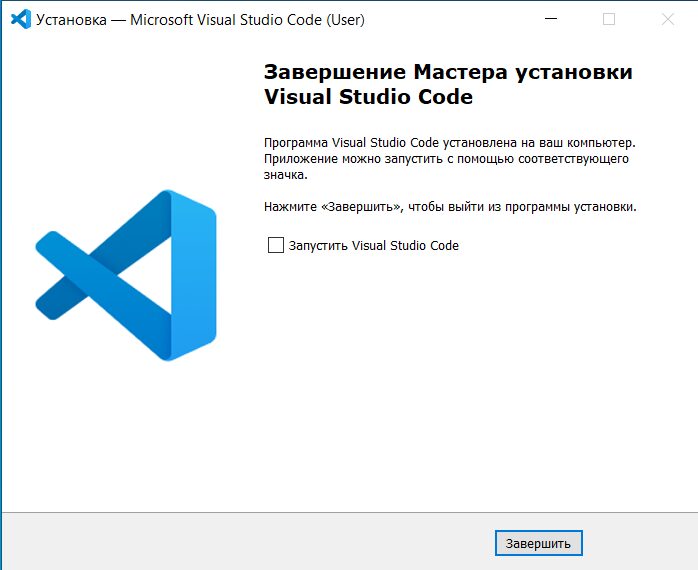
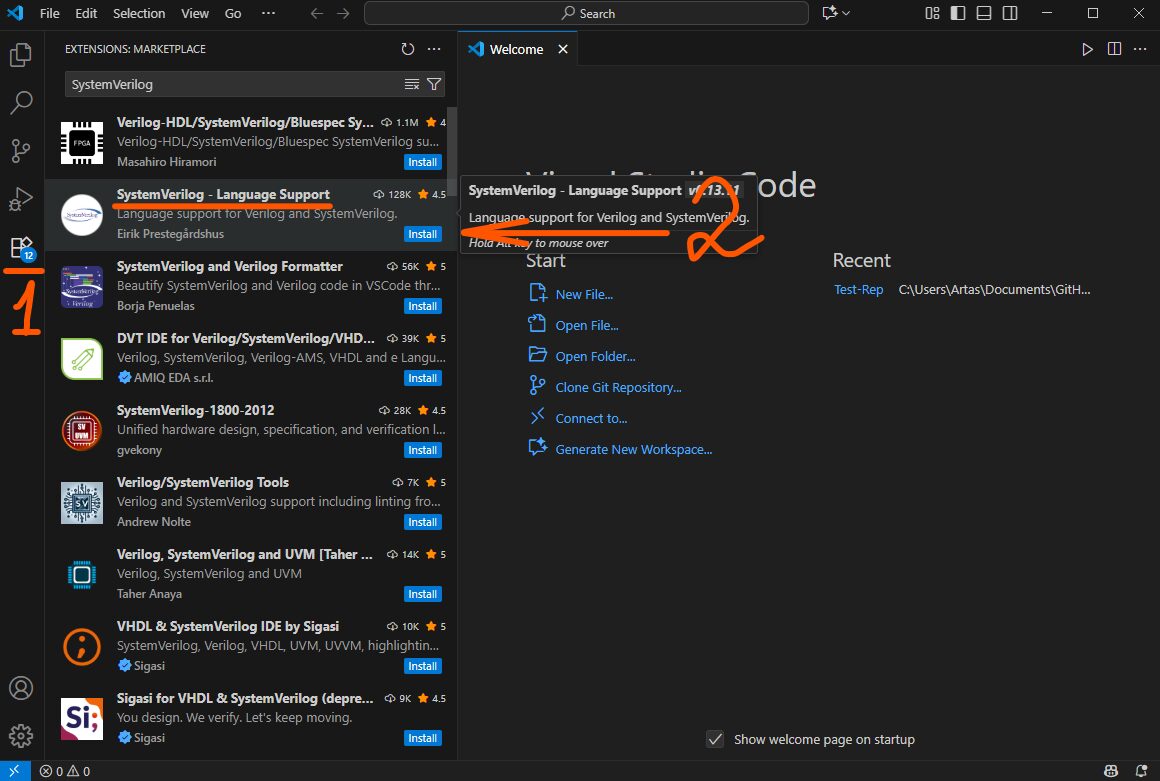
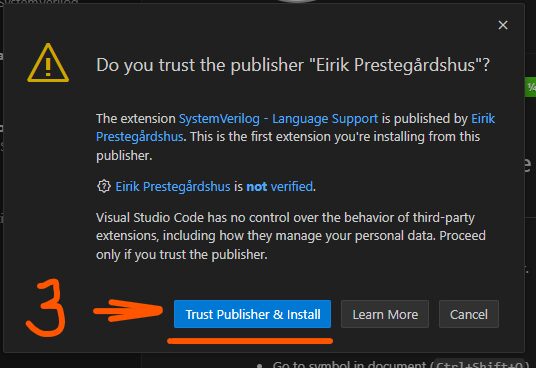
8. Install the syntax highlighting extension: the Extensions tab → search for SystemVerilog → SystemVerilog - Language Support → Install.
4.1.7. Installing Surfer, a waveform viewer
This section did not exist in the previous edition. Surfer is a modern alternative to GTKWave for viewing waveforms. It comes in two forms, and both are useful.
The VS Code extension
Open the Extensions tab, search for Surfer and install it. After
that .vcd files open right in the editor, next to the code —
there is no need to switch to a separate window.
The standalone program
Download a build from the releases page,
gitlab.com/surfer-project/surfer/-/releases,
and put the executable into a directory that is on PATH.
The repository scripts check for a surfer command and, if it is
there, use Surfer instead of GTKWave automatically. For every example the
repository carries a surfer.scr file next to
gtkwave.tcl, with the same set of displayed signals.
4.1.8. Installing Git (mandatory)
Git is needed to download the repository of examples and to pull updates. In addition, under Windows it brings Git Bash — the shell in which all of the repository's scripts run.
Under Windows the BGM scripts are run from
Git Bash, not from cmd.exe and not from
PowerShell. This is not optional.
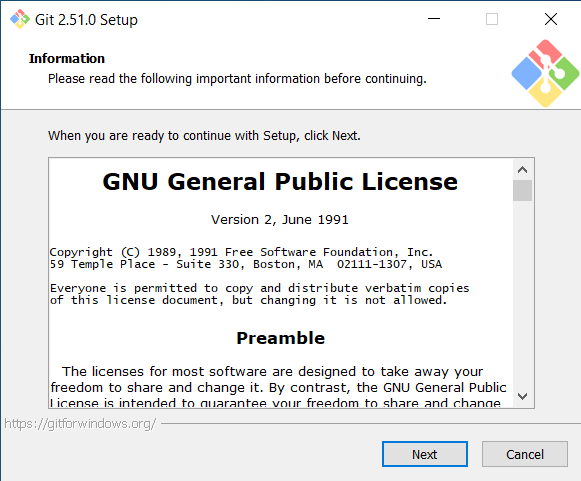
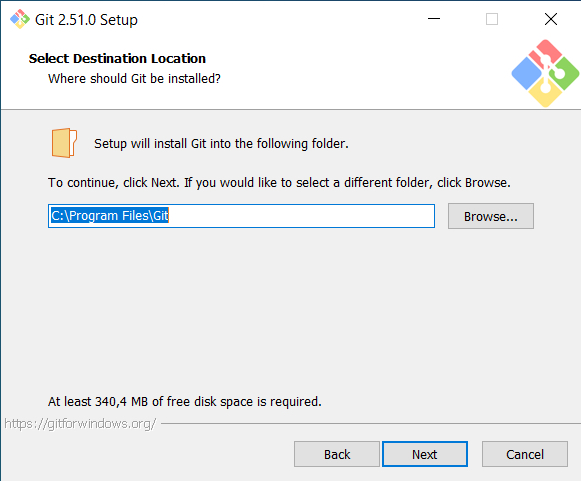
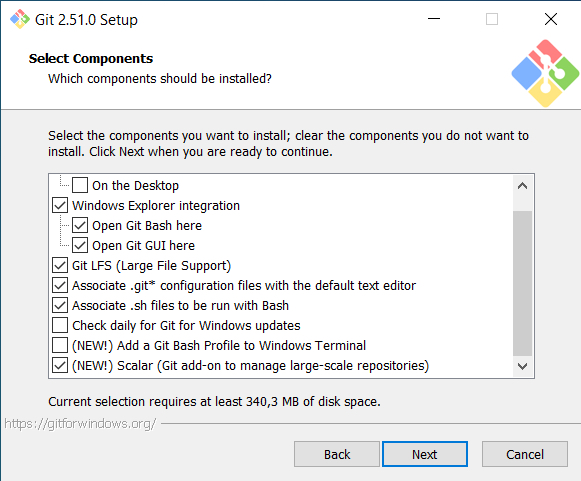
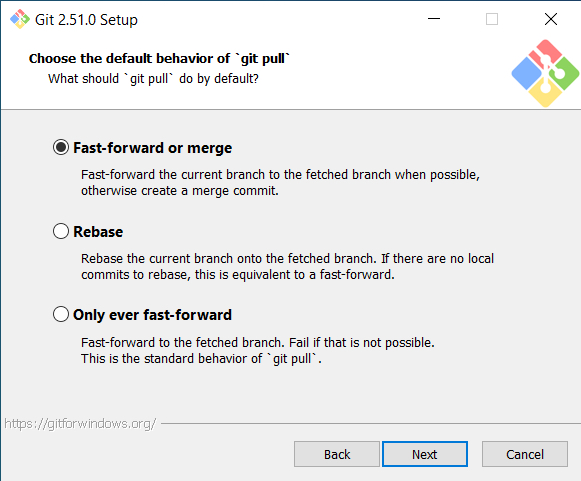
1–3. Download the installer from git-scm.com/downloads/win, accept the agreement, and leave the next three pages at their defaults.
4. For the default editor it is convenient to pick Visual Studio Code from the list.
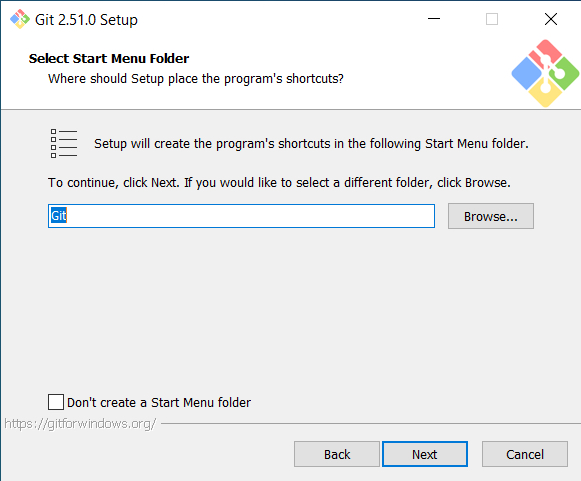
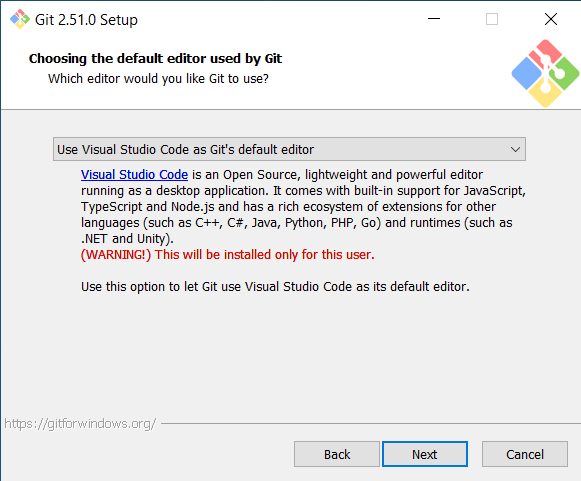
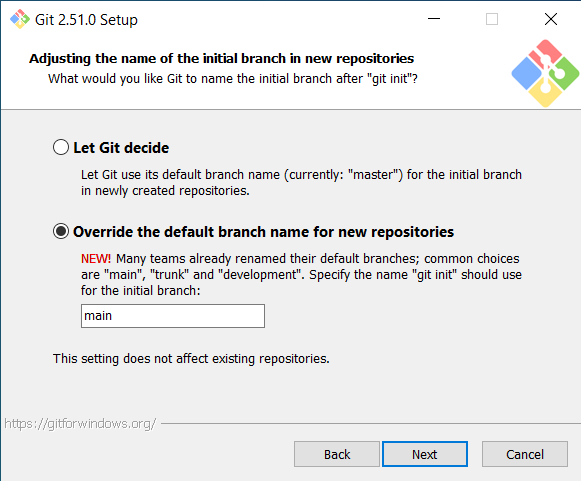
5. Tick Override the default branch name for new
repositories and leave the name as main.
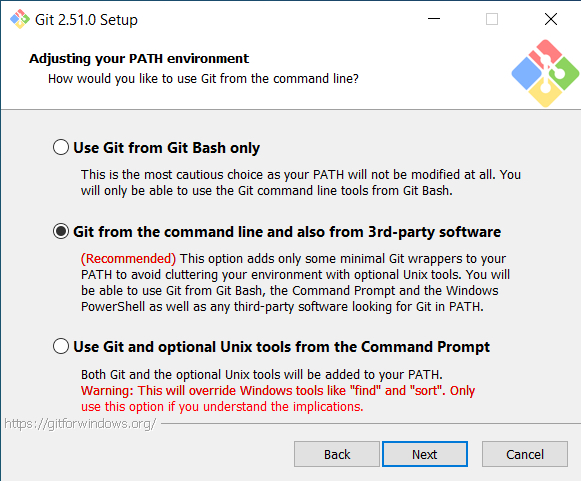
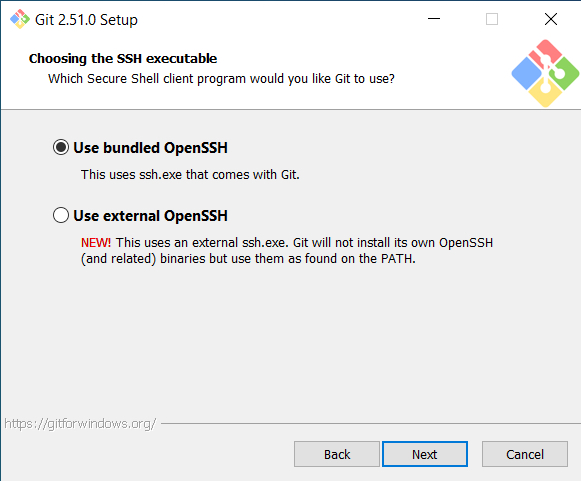
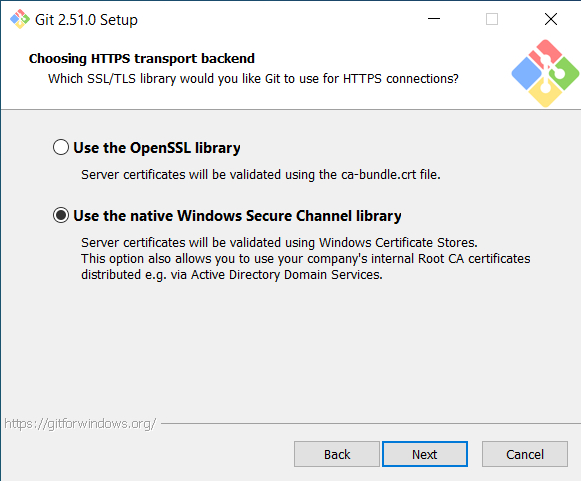
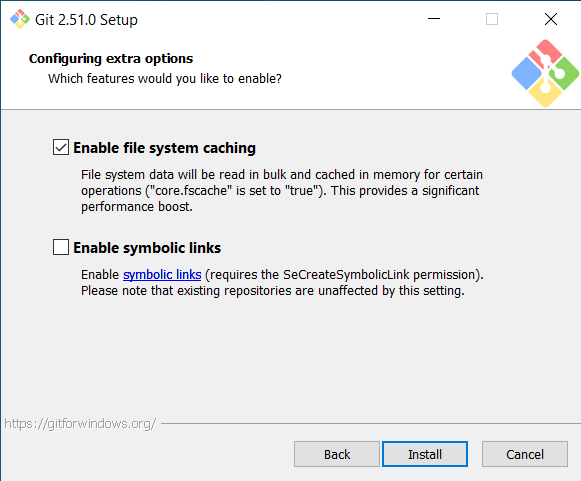
6. Leave the remaining pages at their defaults and finish the installation.
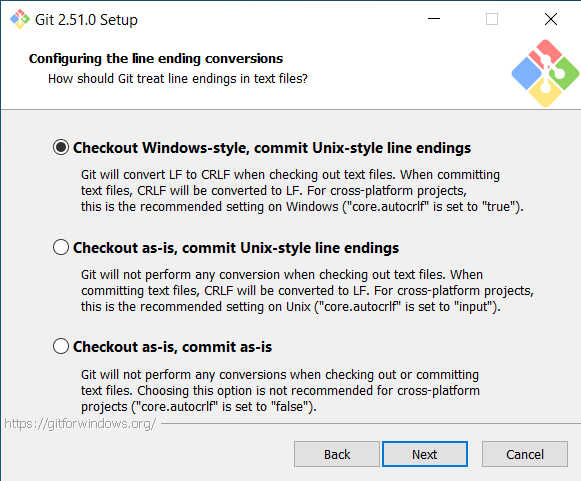
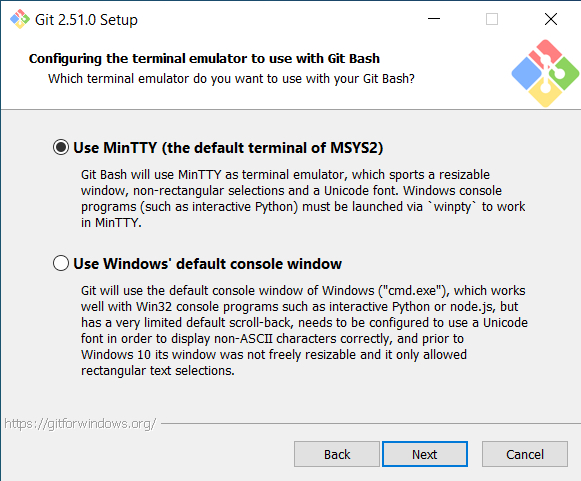
7. Afterwards the system has Git Bash and Git CMD, and Explorer's context menu gains Open Git GUI here and Open Git Bash here.
Getting the repositories
mkdir -p ~/projects
cd ~/projects
git clone https://github.com/chipdesignschool/basics-graphics-music.git
git clone https://github.com/chipdesignschool/systemverilog-homework.gitThe previous edition told you to clone the repositories from
gitflic.ru, including valid-ready-etc. Those
addresses are no longer used: valid-ready-etc is obsolete and the
current repositories live on GitHub (see sections 1.2 and 1.3). That is exactly
why the main-instead-of-master setting matters now —
on GitHub the default branch is called main.
4.1.9. Installing RARS (mandatory)
RARS is a RISC-V instruction set simulator. The assembly
exercises from the processor-architecture part of the course are done in it, and
10_run_instruction_set_simulator.bash launches it.
RARS ships as a single executable jar file, so Java 8 or newer is needed.
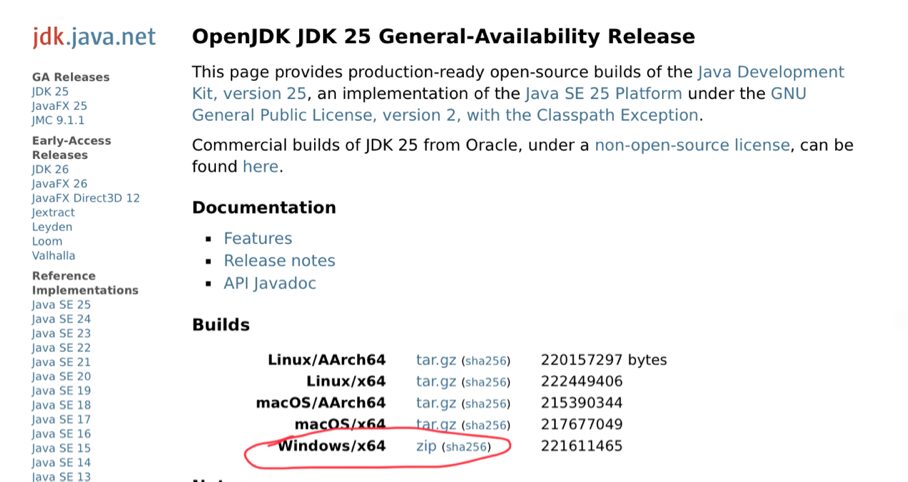
1. Download an OpenJDK build from
jdk.java.net and unpack it, for example
into C:\Program Files\OpenJDK.
2. Create a system variable JAVA_HOME holding
the path to the unpacked directory, and add %JAVA_HOME%\bin to
PATH.
The previous edition wrote this value as
%JAVA_HOME\bin — with the closing percent sign missing, which
makes the entry useless. The correct spelling is
%JAVA_HOME%\bin.
3. Check the installation from cmd:
java --version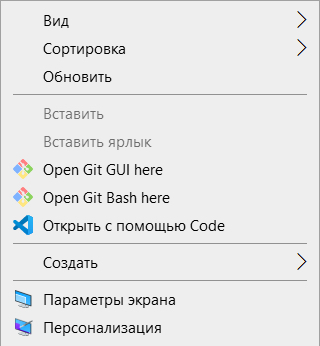

4. Download rars1_6.jar from the releases
page:
github.com/TheThirdOne/rars/releases.
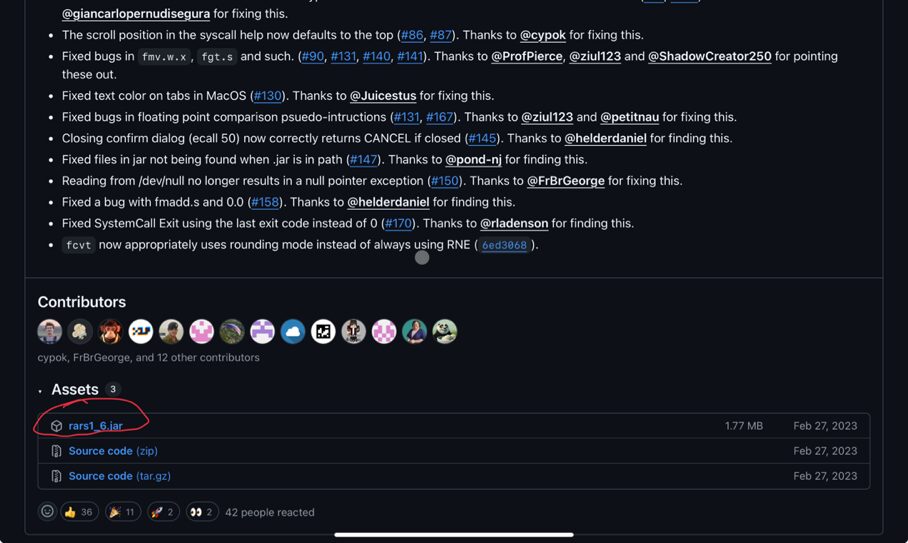

00_setup_rars.source_bash looks for the jar file in the home
directory and in the downloads directory; if several versions are found, the
newest is used.
4.1.10. Installing XPACK RISC-V GCC (for software that runs on a core inside the FPGA)
This section did not exist in the previous edition. It is needed for the part of the course where a processor core is synthesised into the FPGA and C and assembly programs are run on it.
The repository contains three RISC-V cores that can be synthesised into an FPGA:
aps— a core from MIET;yrv— a compact core with a debug interface;picorv32— the well-known small core.
The core is selected with
13_choose_another_riscv_core_for_software.bash.
Building software for such a core needs a cross-compiler. The repository
uses the XPACK RISC-V GCC distribution
(riscv-none-elf-gcc).
Installation
- Download the archive from the releases page: github.com/xpack-dev-tools/riscv-none-elf-gcc-xpack/releases.
- Unpack it into your home directory. You should end up with a directory such
as
~/xpack-riscv-none-elf-gcc-14.2.0-3/containing abinsubdirectory.
00_setup_riscv.source_bash looks for directories named
xpack-riscv-none-elf-gcc-* up to two levels deep from the home
directory, and also for an xpack/bin directory. If several
versions are found it prints a warning and takes one of them.
Building and uploading a program:
./11_build_software_to_run_on_cpu.bash
./12_upload_software_to_the_board_using_uart.bash
./14_run_terminal_program.bash
The terminal program
14_run_terminal_program.bash works with three
terminals: minicom, picocom and
putty. The script finds whichever are installed, offers a
choice of the available UART ports and starts the terminal at the right baud
rate. Under Windows PuTTY is the easiest to install; under Linux, minicom or
picocom.
4.1.11. Installing LibreLane (synthesis into a custom chip)
The previous edition described OpenLane installed through Docker, and that section should be considered entirely obsolete. The repository now uses LibreLane — the continuation of the same project, installed through Nix.
LibreLane is an open-source flow that turns SystemVerilog code into chip layout (RTL-to-GDSII). It only runs under Linux and macOS; under Windows you need WSL or a Linux virtual machine (see section 4.2.11 and the repository's docs/wsl.md).
Installation through Nix
# install the Nix package manager
curl --proto '=https' --tlsv1.2 -sSf -L https://install.determinate.systems/nix | sh -s -- install

# in the LibreLane directory
nix develop
Inside the nix develop shell the librelane command
is available and the repository scripts will find it.
If LibreLane lives somewhere else
Point LIBRELANE_PATH at the directory containing the
executable:
export LIBRELANE_PATH=/path/to/librelane/bin00_setup_libre_lane.source_bash adds that path to
PATH. If the librelane command still cannot be found,
the script prints a message describing both installation methods.
Running it
./07_synthesize_for_asic.bash                  # synthesise for an ASIC
./08_visualize_asic_synthesis_results_1.bash   # inspect the layout
./09_visualize_asic_synthesis_results_2.bash
The viewer is selected with LAYOUT_VIEWER and can be
openroad (the default) or klayout.


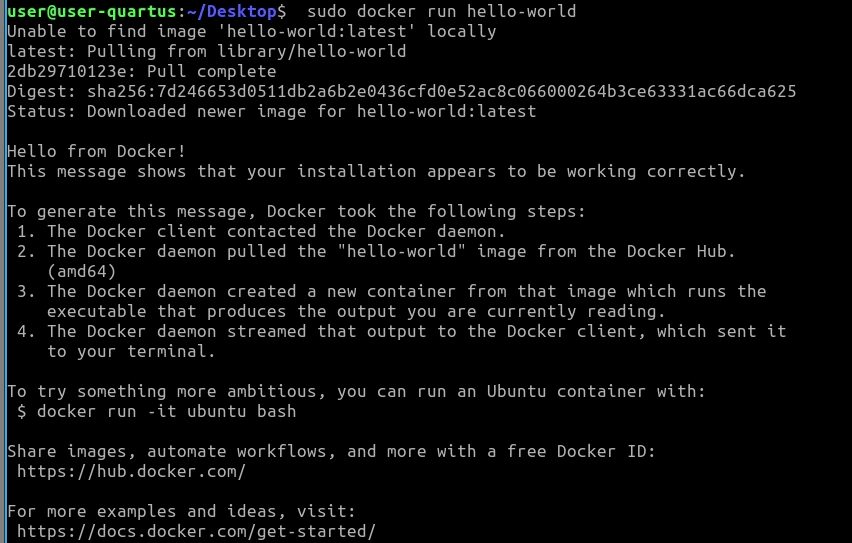
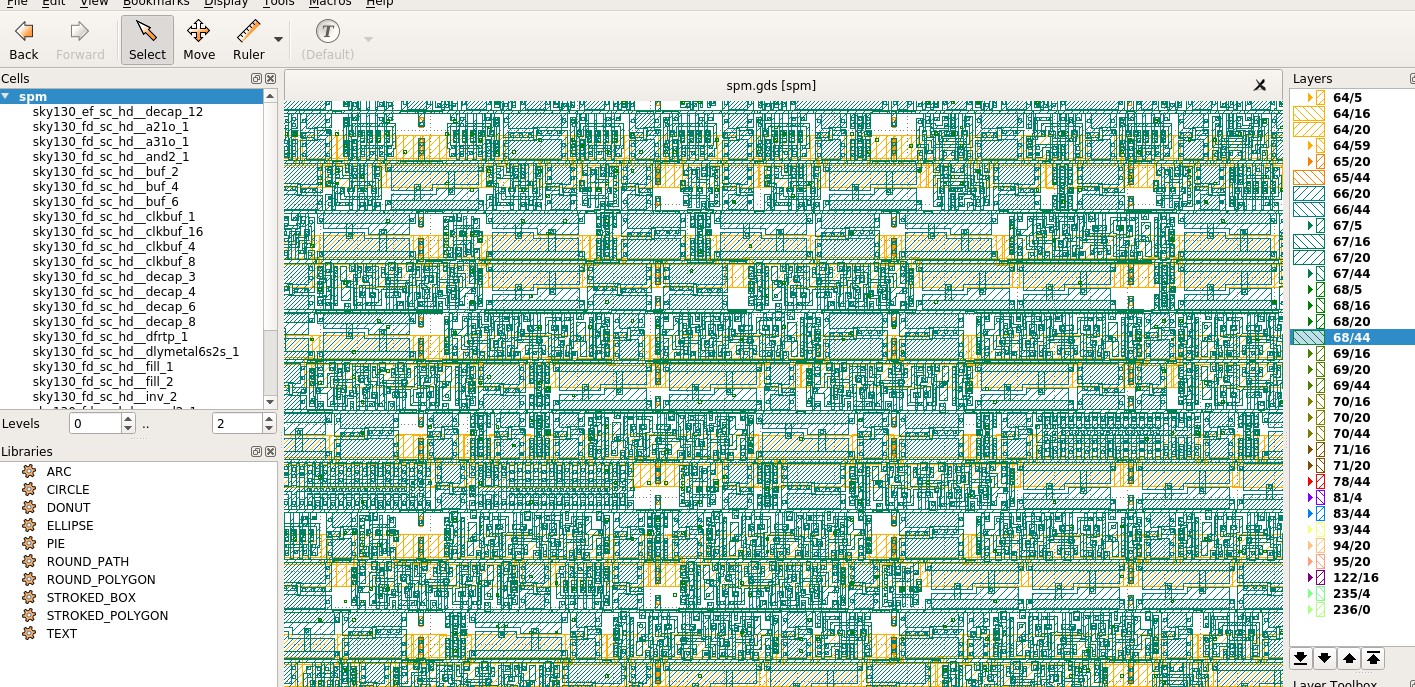
Screenshots from the previous edition, showing OpenLane. They are kept for comparison: the flow itself has been replaced by LibreLane.
4.2. Linux (Ubuntu 22.04 as the example)
The order is the same as for Windows, and the subsection numbering matches. Where a step does not differ, it is not repeated — a pointer to the corresponding subsection of 4.1 is given instead.
Under Linux the scripts run in an ordinary terminal; no separate shell like Git Bash under Windows is needed.
4.2.1. Installing Quartus (for boards with Altera FPGAs)
Quartus is only needed for boards with Altera FPGAs. If your board uses Xilinx, Gowin or Lattice, go to subsections 4.2.2–4.2.4.
4.2.1.1. Installing Quartus Prime Lite 21.1 step by step
1. Download the installer
QuartusLiteSetup-21.1.0.842-linux.run and the
.qdz archive for your chip (see the table in subsection 4.1.1.1),
putting both into the same folder.
2. In a terminal:
chmod +x QuartusLiteSetup-21.1.0.842-linux.run
./QuartusLiteSetup-21.1.0.842-linux.run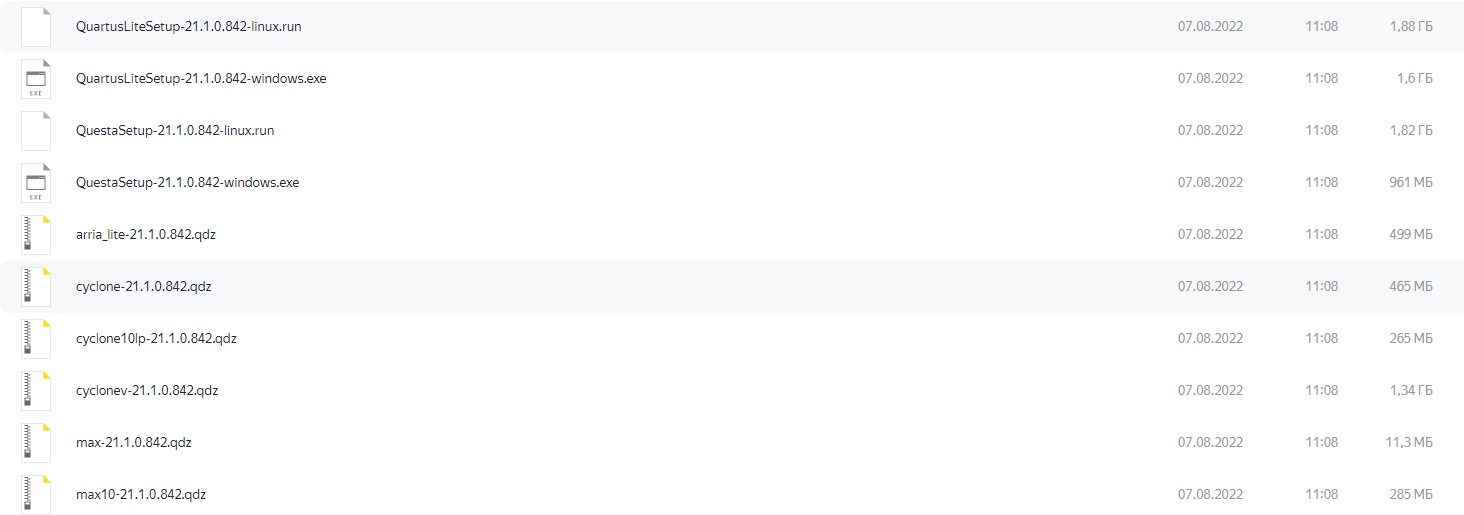
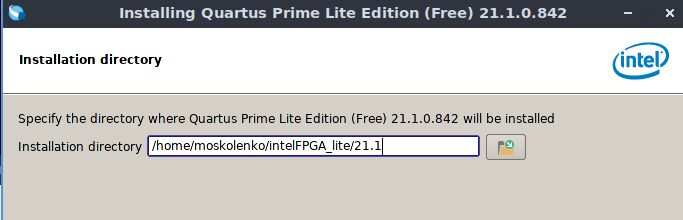
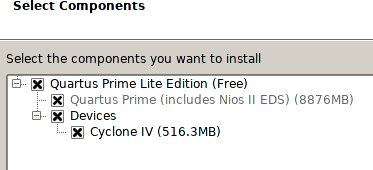
The installation directory must contain no spaces and no non-Latin characters — those break Quartus.
From there the installer behaves just as it does under Windows: it offers
the agreement, the directory, and a Devices list built from the
.qdz files it found. An empty list means the .qdz was
not next to the installer; it can be added later through Tools → Install
Devices.
No environment variables are needed. The
previous edition required these lines in ~/.bashrc:
export QSYS_ROOTDIR=…
export QUARTUS_ROOTDIR=…
PATH=$PATH:/home/user/intelFPGA_lite/20.1/quartus/bin:…
That is no longer necessary — the scripts find Quartus themselves (subsection
4.2.1.4). Note also that in that example the version numbers did not agree
between the lines (21.1 in two variables and 20.1 in PATH) — a
typo that put a non-existent directory on PATH.
4.2.1.2. The udev rule for the USB Blaster
Without a udev rule the programmer is only accessible to root, and Quartus "does not see" it.
1. Connect the board and the programmer and check that the system sees them:
lsusbA line with vendor id 09fb — that is Altera — should
appear.
2. Create the rules file:
sudo nano /etc/udev/rules.d/51-usbblaster.rulesand write this into it:
# USB Blaster
SUBSYSTEM=="usb", ENV{DEVTYPE}=="usb_device", ATTRS{idVendor}=="09fb", ATTRS{idProduct}=="6001", MODE:="0666", SYMLINK+="usbblaster/%k"
SUBSYSTEM=="usb", ENV{DEVTYPE}=="usb_device", ATTRS{idVendor}=="09fb", ATTRS{idProduct}=="6002", MODE:="0666", SYMLINK+="usbblaster/%k"
SUBSYSTEM=="usb", ENV{DEVTYPE}=="usb_device", ATTRS{idVendor}=="09fb", ATTRS{idProduct}=="6003", MODE:="0666", SYMLINK+="usbblaster/%k"

# USB Blaster II
SUBSYSTEM=="usb", ENV{DEVTYPE}=="usb_device", ATTRS{idVendor}=="09fb", ATTRS{idProduct}=="6010", MODE:="0666", SYMLINK+="usbblaster2/%k"
SUBSYSTEM=="usb", ENV{DEVTYPE}=="usb_device", ATTRS{idVendor}=="09fb", ATTRS{idProduct}=="6810", MODE:="0666", SYMLINK+="usbblaster2/%k"

# USB Blaster III (needed for the Terasic DE23-Lite)
SUBSYSTEM=="usb", ENV{DEVTYPE}=="usb_device", ATTRS{idVendor}=="09fb", ATTRS{idProduct}=="6022", MODE:="0666", SYMLINK+="usbblaster3/%k"
The third group of lines is new. USB Blaster
III (idProduct 6022) is used on the Terasic DE23-Lite. The
previous edition had no rule for it, and the board could not be
programmed.
3. Apply the rules and re-plug the programmer cable:
sudo udevadm control --reload
# then unplug and plug the USB Blaster cable back inIf /etc/udev/rules.d/ ends up with two files
containing Blaster rules — say your 51-usbblaster.rules and the
90-altera.rules that ships with Quartus — nothing breaks: udev
reads every file and applies every matching rule. But if they
set different permissions, the file that comes first alphabetically wins,
because the := operator forbids further changes. You can check
which rule took effect with udevadm test.
4.2.1.3. Checking the Quartus installation
The steps are the ones in subsection 4.1.1.3: start Quartus, open Programmer, press Hardware Setup and check that USB-Blaster is in the list.

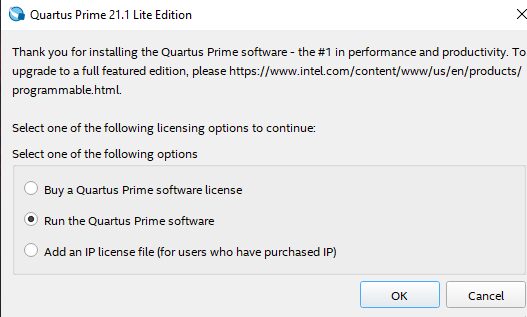
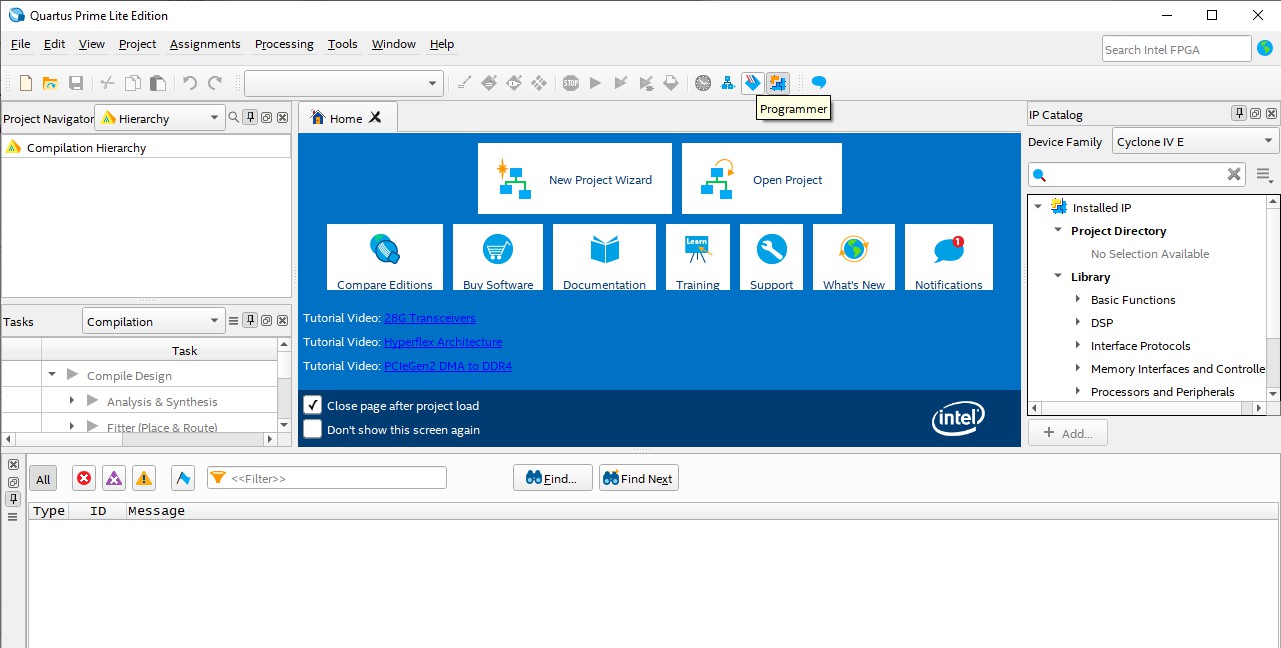
Under Lubuntu the Programmer window sometimes refuses to dock. Window → Attach Window helps.
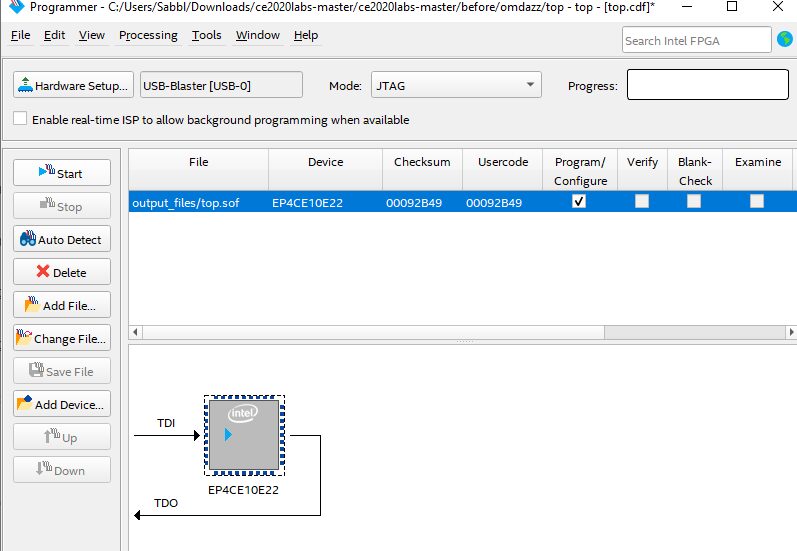

The word Successful means that Quartus and the programmer work
4.2.1.4. How the BGM scripts find Quartus
Exactly as under Windows — see subsection
4.1.1.4. Only the list of standard locations differs:
under Linux it is the home directory, /opt and
/tools (under Windows the drive roots /c,
/d and /e take their place).
4.2.2. Installing AMD Vivado (for boards with Xilinx FPGAs)
Download the installer from the AMD site, make it executable and run it:
chmod +x FPGAs_AdaptiveSoCs_Unified_*_Lin64.bin
./FPGAs_AdaptiveSoCs_Unified_*_Lin64.bin
From there the dialogs are the ones under Windows (subsection 4.1.2): pick Vivado, tick the Zynq-7000, Artix-7, Kintex-7 and Spartan-7 families, accept the agreement.
After the installation, run the cable driver script — without it the programmer is not accessible to an ordinary user:
cd $XILINX_VIVADO/data/xicom/cable_drivers/lnx64/install_script/install_drivers
sudo ./install_driversOn distributions outside the officially supported list,
Vivado may fail to start because libtinfo.so.6 is missing — the
message reads couldn't load file "libxv_tcltasks.so" followed by
Failed to load feature 'core'. The cause is that Vivado's own
ldlibpath.sh does not know your distribution and so does not add
the right path for it. The fix is to put a compatible library into
$XILINX_VIVADO/lib/lnx64.o/Default/.
How the scripts find Vivado is in subsection 4.1.2; the order is the same on every system.
4.2.3. Installing Gowin EDA (for boards with Gowin FPGAs)
Download the Linux archive (registration on the Gowin site is required) and
unpack it into your home directory or into /opt, so that you end
up with a path such as ~/Gowin/Gowin_V1.9.9/IDE.
Access to the programmer needs a udev rule — the programmer on the Tang boards is built on an FTDI chip:
sudo nano /etc/udev/rules.d/91-sipeed.rulesSUBSYSTEM=="usb", ATTRS{idVendor}=="0403", ATTRS{idProduct}=="6010", MODE:="0666"
SUBSYSTEM=="usb", ATTRS{idVendor}=="0403", ATTRS{idProduct}=="6014", MODE:="0666"sudo udevadm control --reloadHow the scripts find Gowin EDA is in subsection 4.1.3.
4.2.4. OSS CAD Suite — the open-source flow for Gowin and Lattice
Exactly as under Windows (subsection 4.1.4): unpack the archive into
~/oss-cad-suite and do nothing else — the scripts will activate
it.
cd ~
tar xzf oss-cad-suite-linux-x64-*.tgz
4.2.5. Installing Icarus Verilog and a waveform viewer (mandatory)
For Ubuntu 22.04 and newer:
sudo add-apt-repository ppa:team-electronics/ppa
sudo apt-get update
sudo apt install iverilog gtkwave
Check the version:
iverilog -V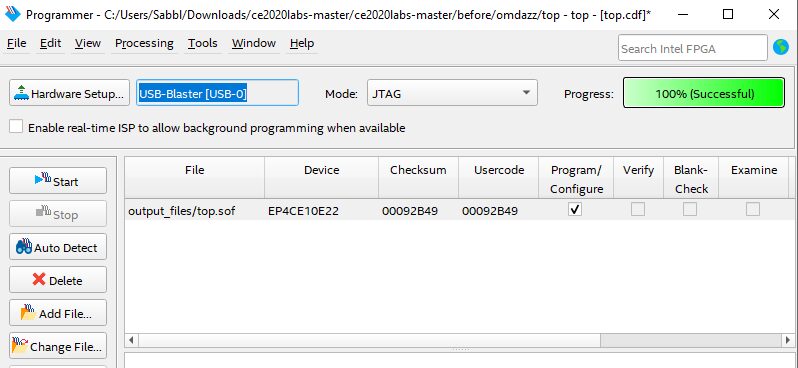
Version 13 is the minimum, 14 is better. If your distribution only carries version 11 or 12, there are three ways out: take Icarus from OSS CAD Suite (subsection 4.2.4), build it from source, or install a build from bleyer.org/icarus (the sources are there too). The scripts check the version and will warn you if it is too old.
Building from source into ~/install/iverilog — a path the
scripts know:
git clone https://github.com/steveicarus/iverilog.git
cd iverilog && sh autoconf.sh
./configure --prefix=$HOME/install/iverilog
make -j$(nproc) && make install
4.2.6. Installing Visual Studio Code (mandatory)
Download the .deb package from
code.visualstudio.com and install
it:
sudo dpkg -i code_*.deb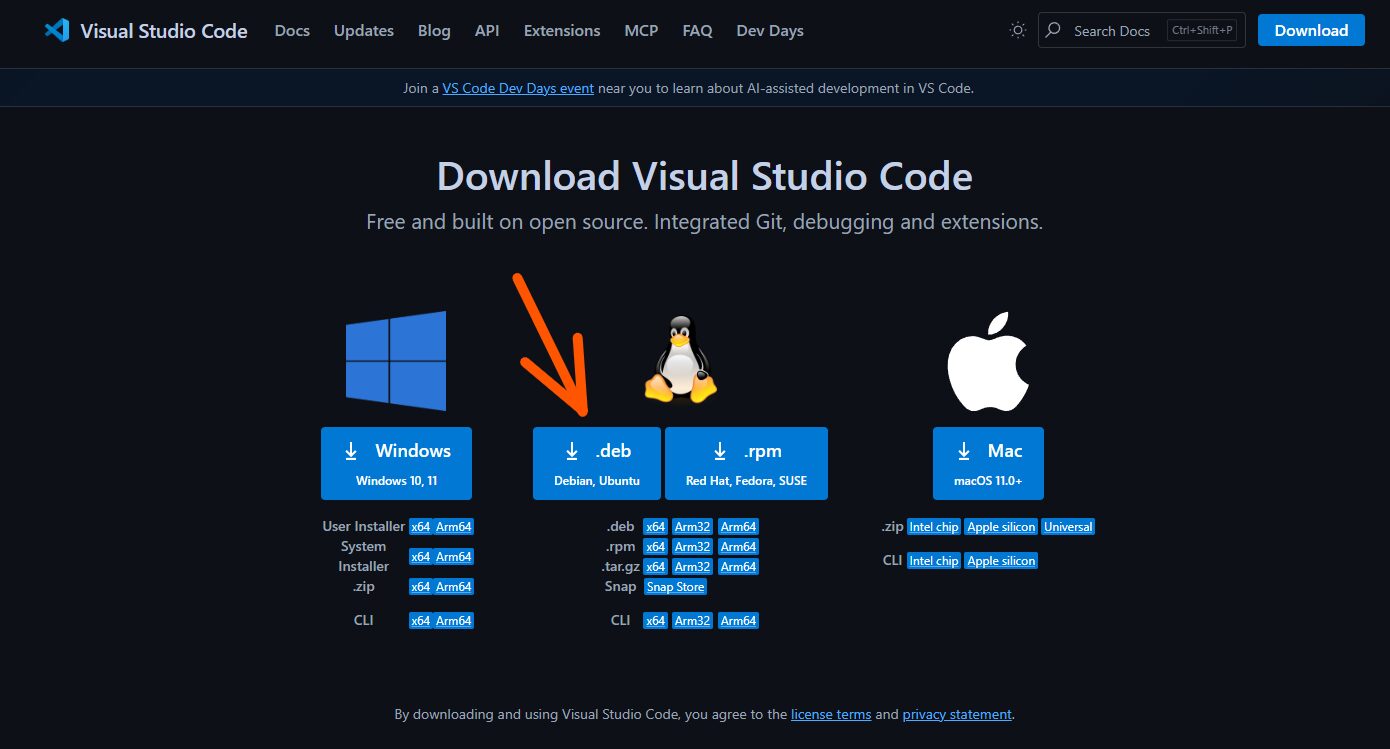
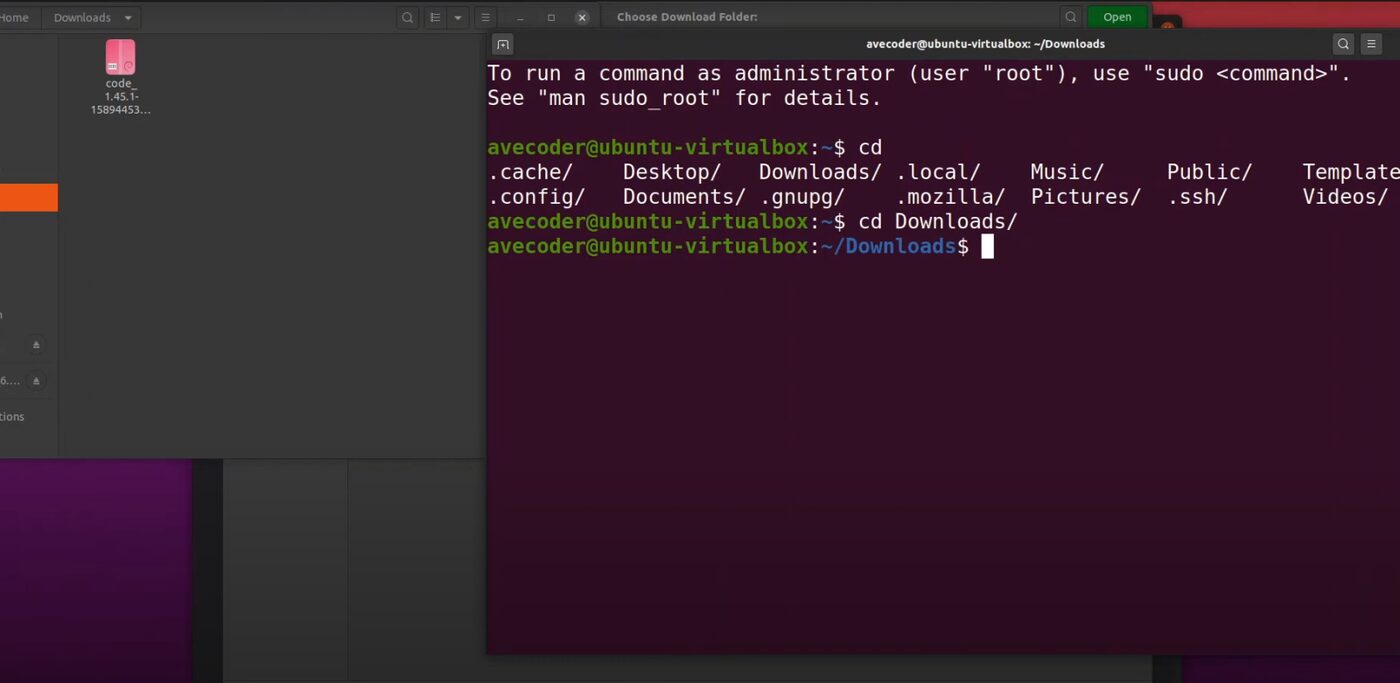
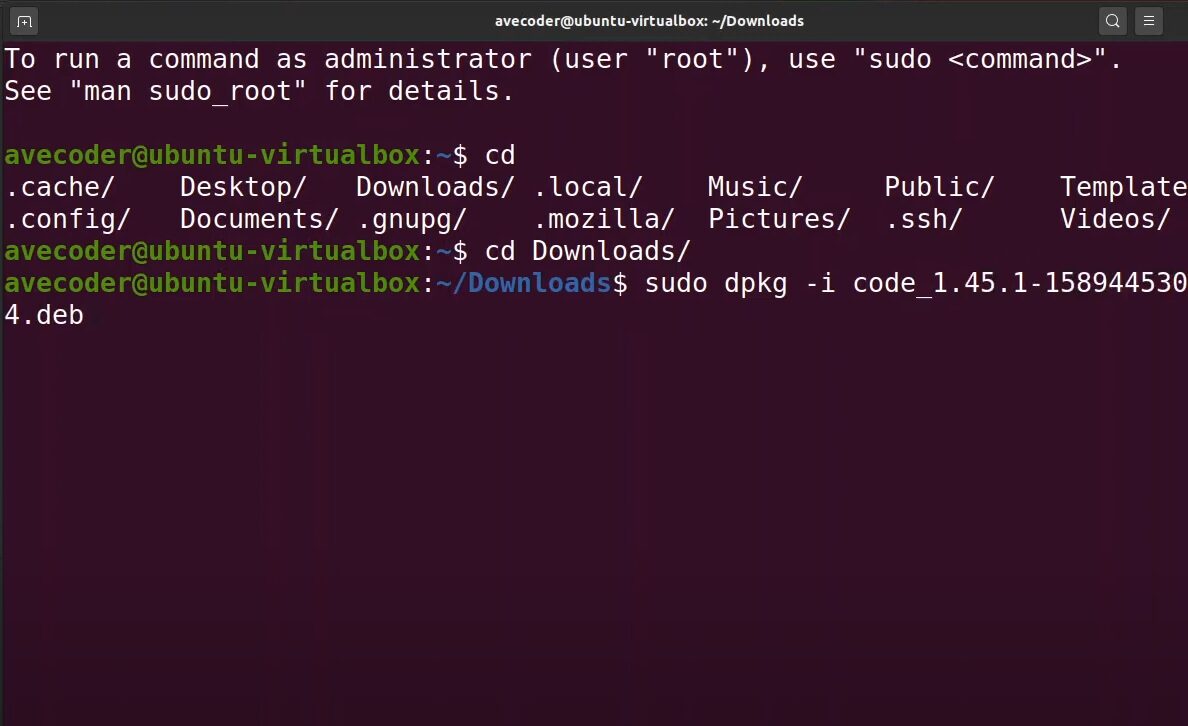
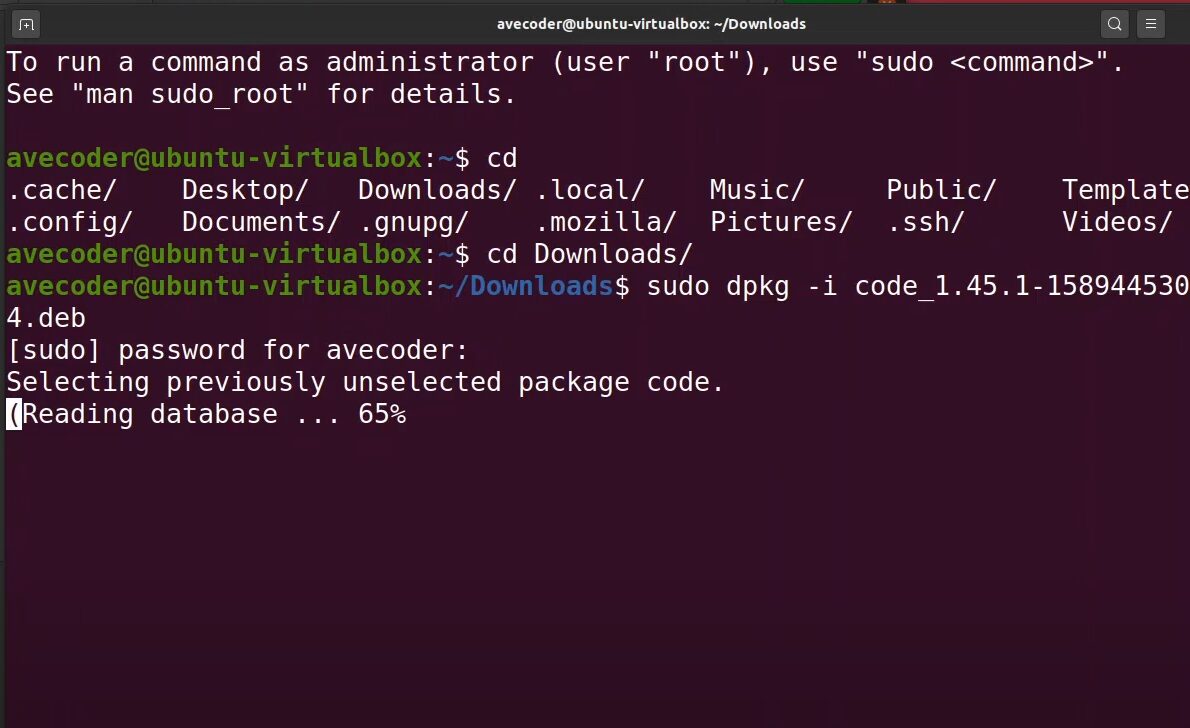
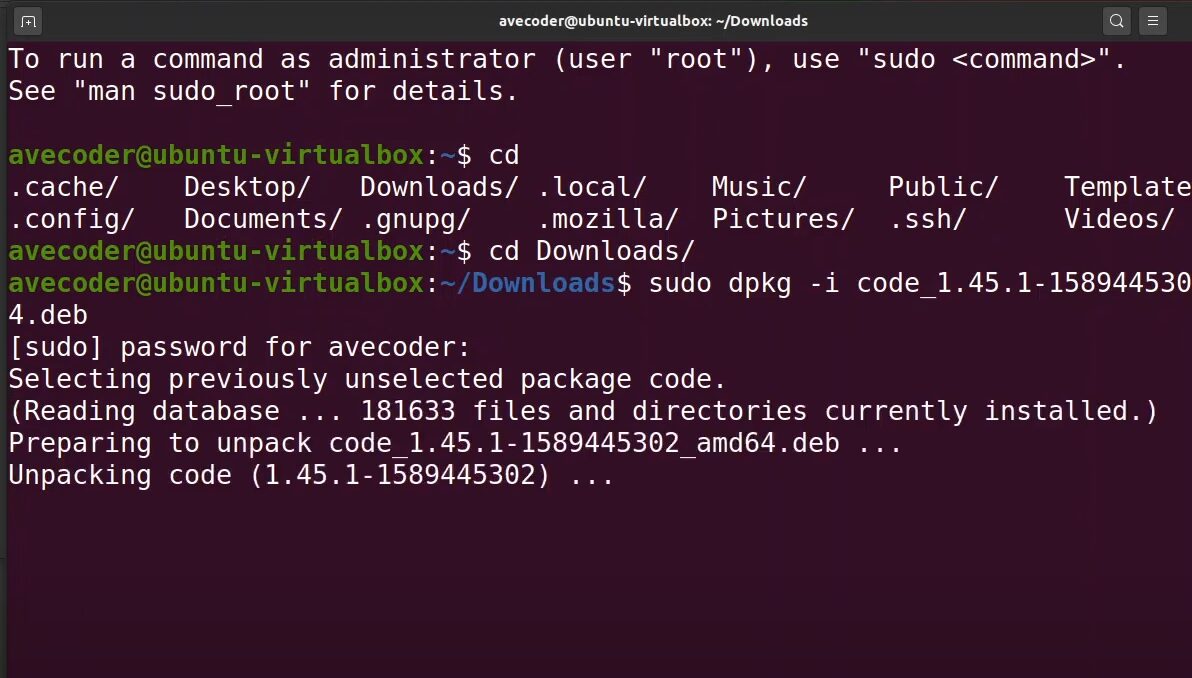
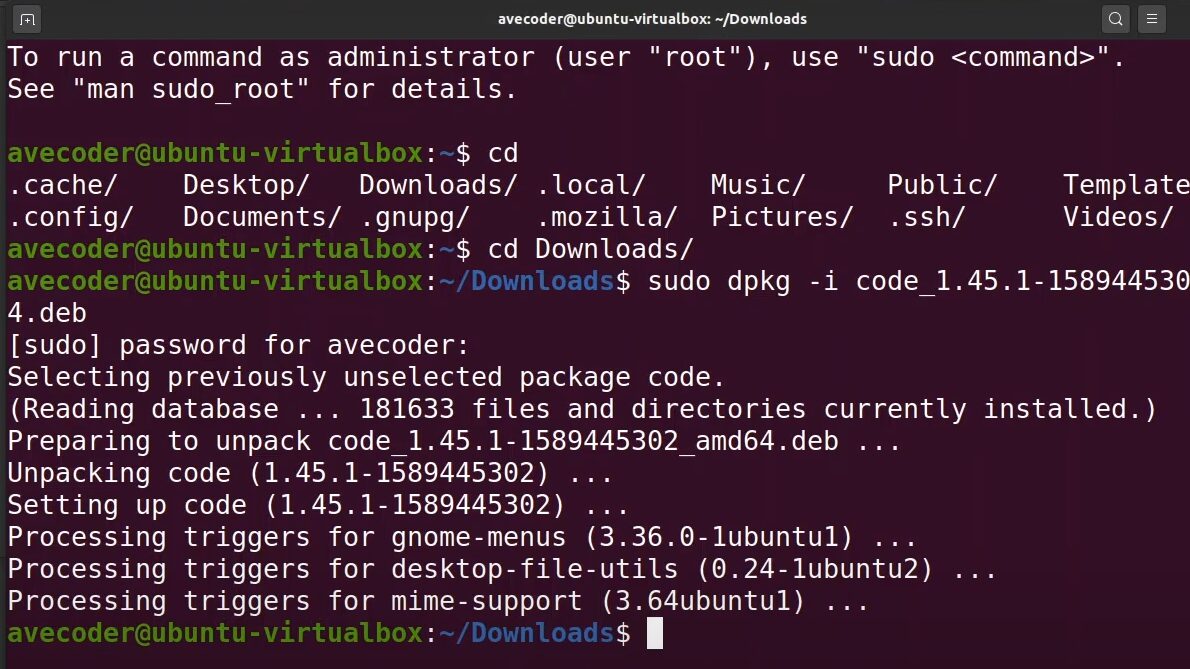
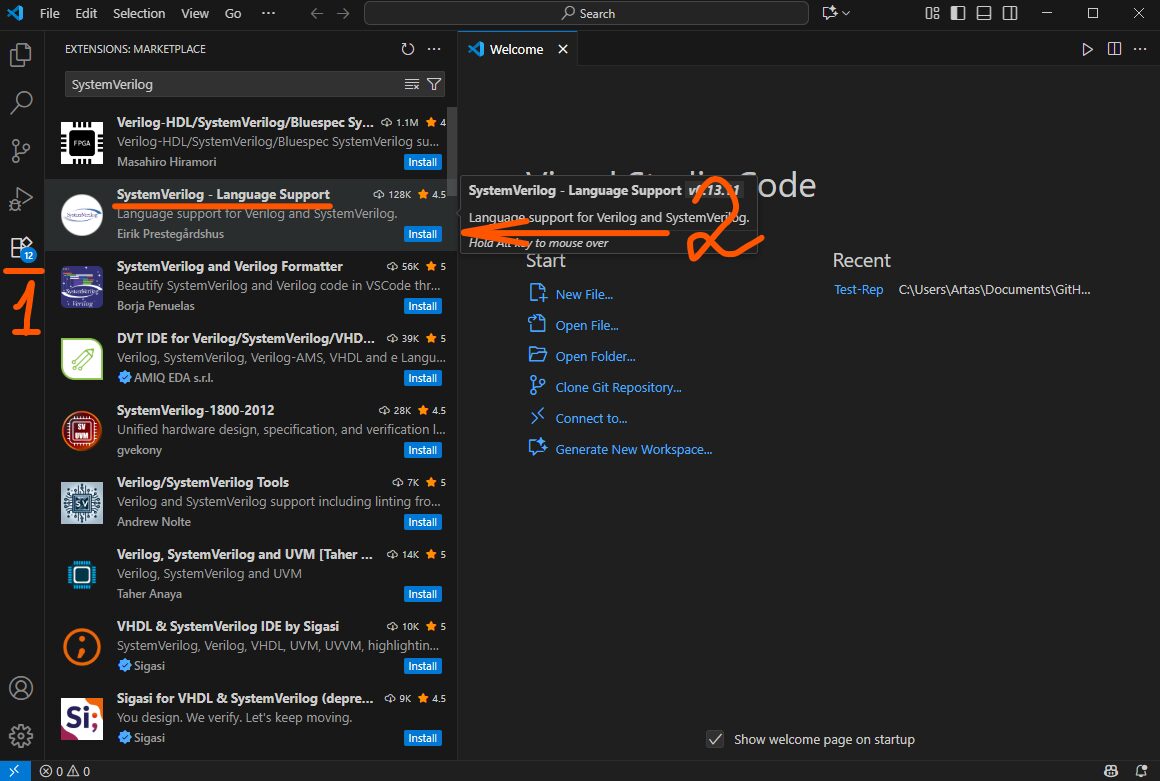
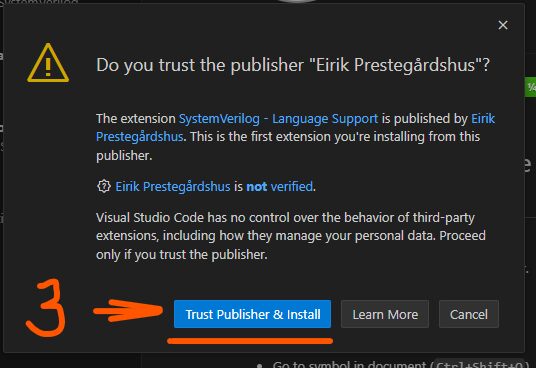
Then install the SystemVerilog - Language Support and Surfer extensions, exactly as under Windows (subsections 4.1.6 and 4.1.7)
4.2.7. Installing Surfer, a waveform viewer
Download the Linux build from the releases page,
gitlab.com/surfer-project/surfer,
unpack it and put the executable into a directory that is on
PATH — ~/.local/bin, for instance:
mkdir -p ~/.local/bin
tar xzf surfer-*-linux.tar.gz -C ~/.local/bin --strip-components=1 surfer/surfer
surfer --version
To make the scripts open waveforms in Surfer rather than GTKWave:
export WAVE_VIEWER=surferMore about choosing the viewer in subsection 4.1.7.
4.2.8. Installing Git (mandatory)
sudo apt install gitSet your name and address — otherwise Git refuses to commit:
git config --global user.name "Your Name"
git config --global user.email "you@example.com"
git config --global init.defaultBranch main
No separate shell is needed: under Linux the scripts run in an ordinary terminal.
4.2.9. Installing RARS (mandatory)
Java is needed. Under Linux it installs with one command and neither
JAVA_HOME nor PATH has to be touched:
sudo apt install default-jre
java --version
Then download rars1_6.jar from the releases page
(github.com/TheThirdOne/rars)
into your home directory and run it:
java -jar rars1_6.jar10_run_instruction_set_simulator.bash finds the
.jar itself — see subsection 4.1.9.
4.2.10. Installing XPACK RISC-V GCC and a terminal program
The compiler. Unpack the XPACK archive into your home directory — the scripts will find it (subsection 4.1.10):
cd ~
tar xzf xpack-riscv-none-elf-gcc-*-linux-x64.tar.gz
The terminal program. It is needed to upload a program into the board over UART and to talk to the processor inside the FPGA:
sudo apt install minicom picocom14_run_terminal_program.bash picks the program through the
TERMINAL_PROGRAM variable (minicom,
picocom or putty).
To reach the serial port without sudo, add yourself to the
dialout group:
sudo usermod -aG dialout $USER
# then log out and back inThat group is the most common cause of a
Permission denied on /dev/ttyUSB0. The change only
takes effect after a new login; restarting the terminal is not
enough.
4.2.11. Installing LibreLane (synthesis into a custom chip)
See subsection 4.1.11 — installing through Nix is the same on Linux and macOS. Under Linux this is the normal, native route: neither WSL nor a virtual machine is involved.
curl --proto '=https' --tlsv1.2 -sSf -L https://install.determinate.systems/nix | sh -s -- install
nix develop
./07_synthesize_for_asic.bash
4.3. macOS
There is no Quartus and no Vivado for macOS. Neither Altera nor AMD releases those programs for macOS in any form. This means boards with Altera and Xilinx FPGAs cannot be used from macOS directly — you need a Linux or Windows virtual machine (sections 5 and 7), or a separate computer.
These, on the other hand, work fully and need no tricks:
- Gowin EDA — the Tang boards (with the caveat below);
- OSS CAD Suite — Gowin and Lattice boards;
- Icarus Verilog, GTKWave, Surfer, VS Code, Git, RARS, XPACK RISC-V GCC, LibreLane.
In other words, a Mac is a comfortable place to learn with a Tang Nano 9K — one more reason the School recommends it as the inexpensive option.
Otherwise macOS behaves like Linux: the same scripts, the same terminal, the same commands. But there are four peculiarities, all of them built into the scripts themselves.
1. Gowin EDA only works on Apple Silicon
On Intel Macs Gowin EDA does not start, and the script says so directly:
Gowin IDE is not working on your platform (Mac x64?)On Macs with M1 and newer it works.
2. A different Gowin directory layout
Under macOS Gowin EDA ships as an application bundle, with the executables
inside it. The script looks for the directories GowinIDE.app,
Gowin and gowin, and inside them additionally checks
the sub-path:
Contents/Resources/Gowin_EDASo the installation path looks like, for instance,
/Applications/GowinIDE.app/Contents/Resources/Gowin_EDA/IDE/bin.
The DYLD_FRAMEWORK_PATH and DYLD_LIBRARY_PATH
variables, without which Gowin EDA cannot find its own libraries under macOS,
are set by the script — you do not need to set them by hand.
3. Quarantine: "the developer cannot be verified"
macOS marks everything downloaded from the internet with the
com.apple.quarantine attribute and refuses to run it. This is the
most common reason why Gowin EDA, OSS CAD Suite and the XPACK compiler "do not
work" on a Mac.
The repository scripts detect this and suggest the command, but removing the attribute is up to you. These are checked:
- the Gowin EDA directory and its
IDEandProgrammersubdirectories; ~/oss-cad-suiteand~/Downloads/oss-cad-suite;- the XPACK RISC-V GCC directory.
The command for any of them:
xattr -rd com.apple.quarantine ~/oss-cad-suite

# if that gives Permission denied:
sudo xattr -rd com.apple.quarantine ~/oss-cad-suiteHaving found the attribute, the script asks
Abort, Retry, Ignore? [a/R/i]. That means: open a second terminal
window, run the suggested xattr command, come back and press
Enter — Retry is the default, and the script checks the
attribute again. Answering i carries on without removing it (most
likely into an error); a aborts.
4. The waveform viewer: Surfer on Apple Silicon
On Macs with an M1 or newer the scripts open waveforms in Surfer rather than GTKWave, and require it to be installed:
brew install surfer # or download a build from the releases pageOn Intel Macs GTKWave is used, and the executable inside the application bundle is launched directly:
/Applications/gtkwave.app/Contents/MacOS/gtkwave-binSo there it is enough to drag gtkwave.app into
/Applications. Launching it with open -a gtkwave will
not do: that way GTKWave does not read the gtkwave.tcl script that
pre-arranges the signals on the waveform — the script's own comment says so.
One more detail baked into the scripts: when searching for
the XPACK compiler under macOS, the Desktop directory is pruned
from the search. This keeps macOS from asking for permission to read your
desktop files on every run.
Installing the rest through Homebrew:
brew install git icarus-verilog
brew install surfer                      # on Apple Silicon
brew install gtkwave                     # on an Intel Mac
brew install --cask visual-studio-codeThis macOS section is written from the code of the
repository's scripts (the darwin branches in
00_setup_gowin, 00_setup_yosys,
00_setup_icarus, 00_setup_riscv and
00_setup.source_bash), not verified on a live macOS machine. If
you hit a discrepancy, please report it and this section will be
corrected.
top ↑5. A virtual machine for the functional verification classes
The functional verification part of the course needs the Questa simulator. It is distributed separately and may require a licence, so the School hands out a ready-made virtual machine with the simulator installed.
- Install VirtualBox.
- Download and unpack the virtual machine archive (the School provides the link).
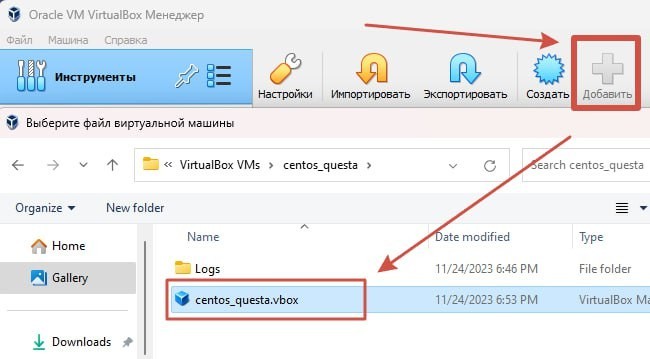
- Start VirtualBox and add the machine with Add, pointing it at the
.vboxfile in the unpacked directory. - Start the machine. The user password is
1234. - Open a terminal (Applications → System Tools → Terminal) and type
vsim. The simulator's welcome window should appear.
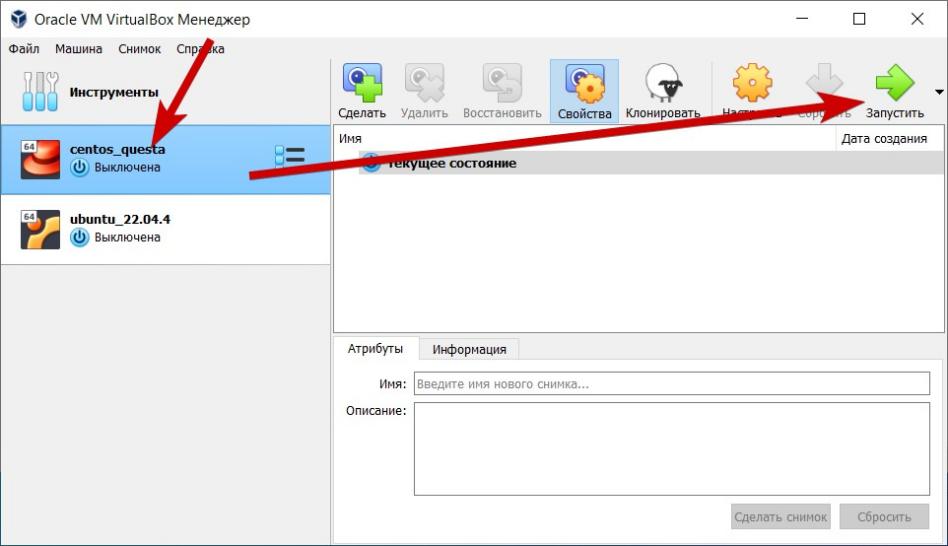
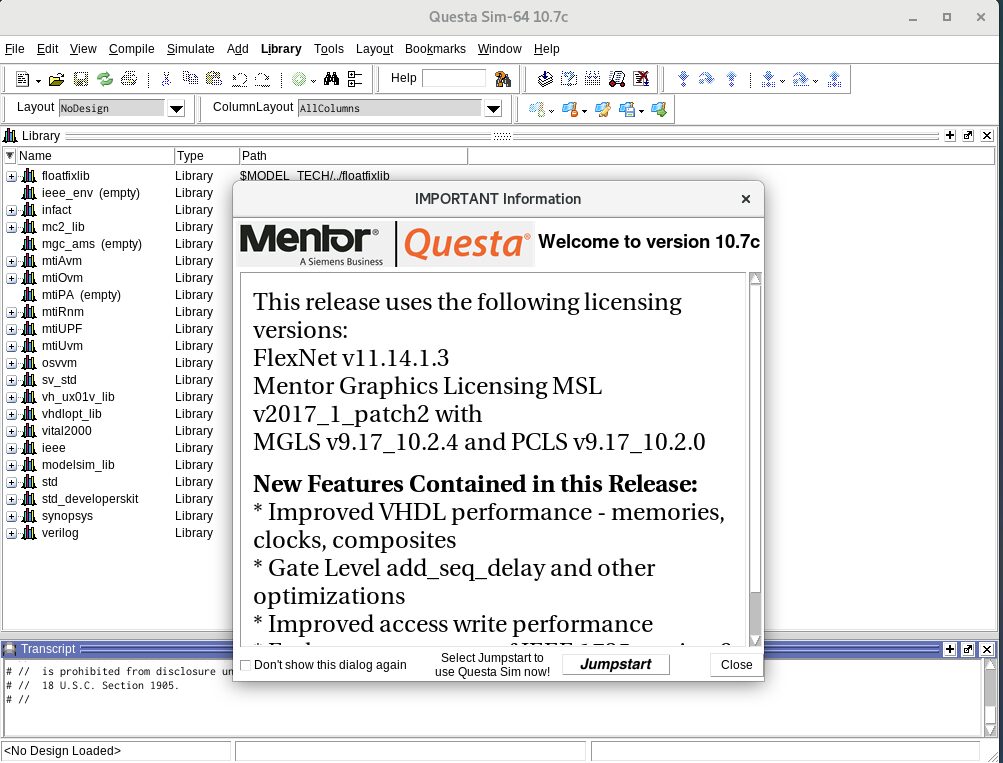
If you run into trouble, write to the School's chat.
top ↑6. A bootable SSD with the software preinstalled
Instead of installing everything by hand, you can get a ready SSD image with the software preinstalled and boot from it. This is convenient for classrooms.
The section is based on Yuri Panchul's article: habr.com/ru/articles/754262.
The image contains the software for Altera boards (Quartus). Vivado and Gowin EDA are installed separately if needed. The Questa in the image may require a licence.
6.1. Writing the image onto the SSD
Download the .img file (the School provides the link).
About GPT. A disk carries two GPT partition tables — the primary one and a backup. The image (about 50 GB unpacked) is smaller than any modern SSD, so after writing it the backup table survives untouched and gets in the way of the first boot. The second table therefore has to be erased.
A script in the repository does this:
scripts/admin/erase_ssd_gpt_and_write_bootable_image.bashPut the script into the directory holding the image (or the image into the
directory holding the script) and run it under sudo. The script
checks that there is exactly one image, asks which disk to overwrite, makes
sure that disk is not mounted, and writes the image. The operation takes tens
of minutes.
6.2. Booting from the SSD
Connect the SSD to a powered-off computer, switch it on and start pressing the key that opens the boot menu:
| Manufacturer | Key |
|---|---|
| ASUS, Acer | Del or F2 |
| Dell | F12 or F2 |
| HP | F10 |
| Lenovo | F2 or Fn+F2 (laptops), F1 (desktops), Enter then F1 (ThinkPad) |
| MSI | Del |
| Samsung | F2 |
The image supports both UEFI and legacy boot.
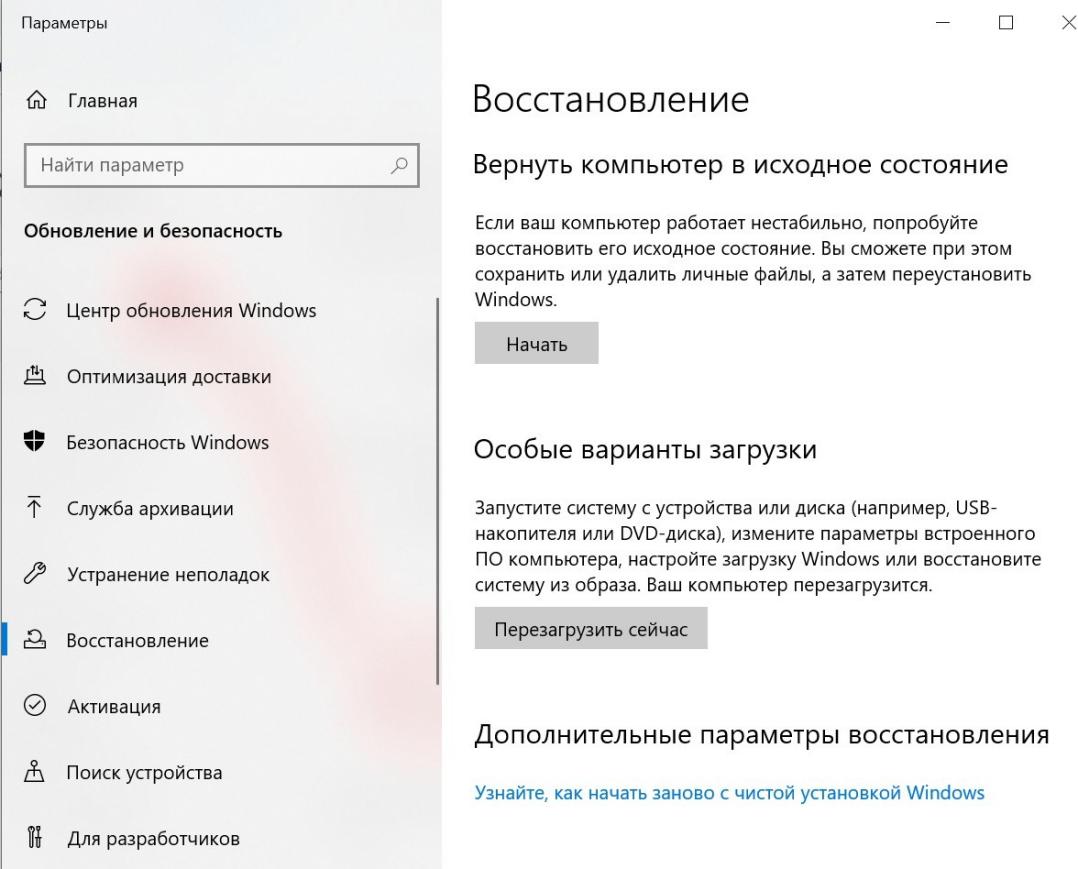
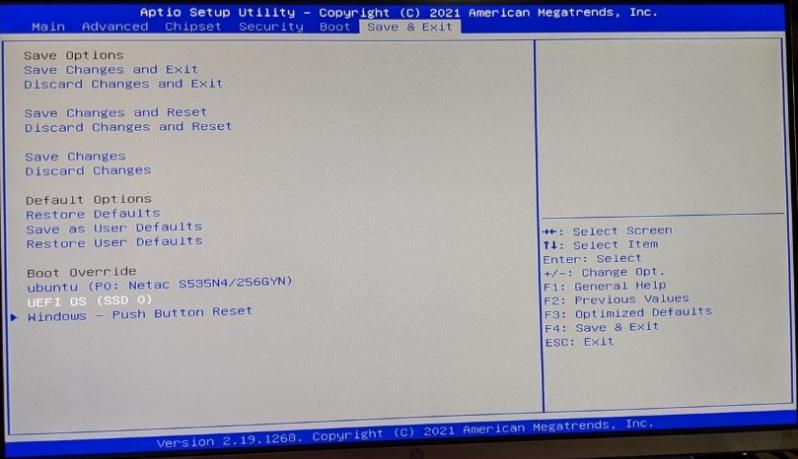
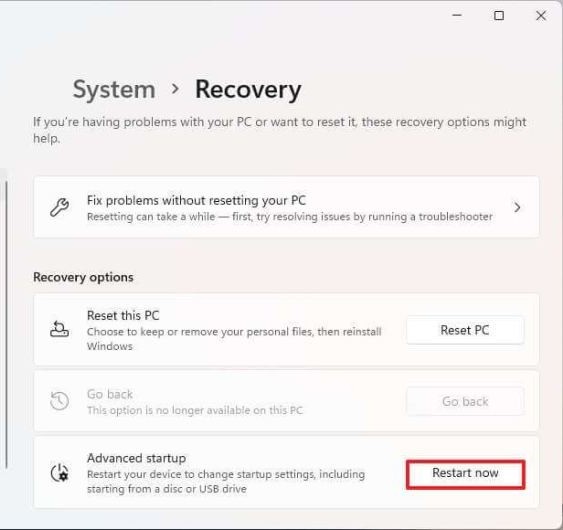
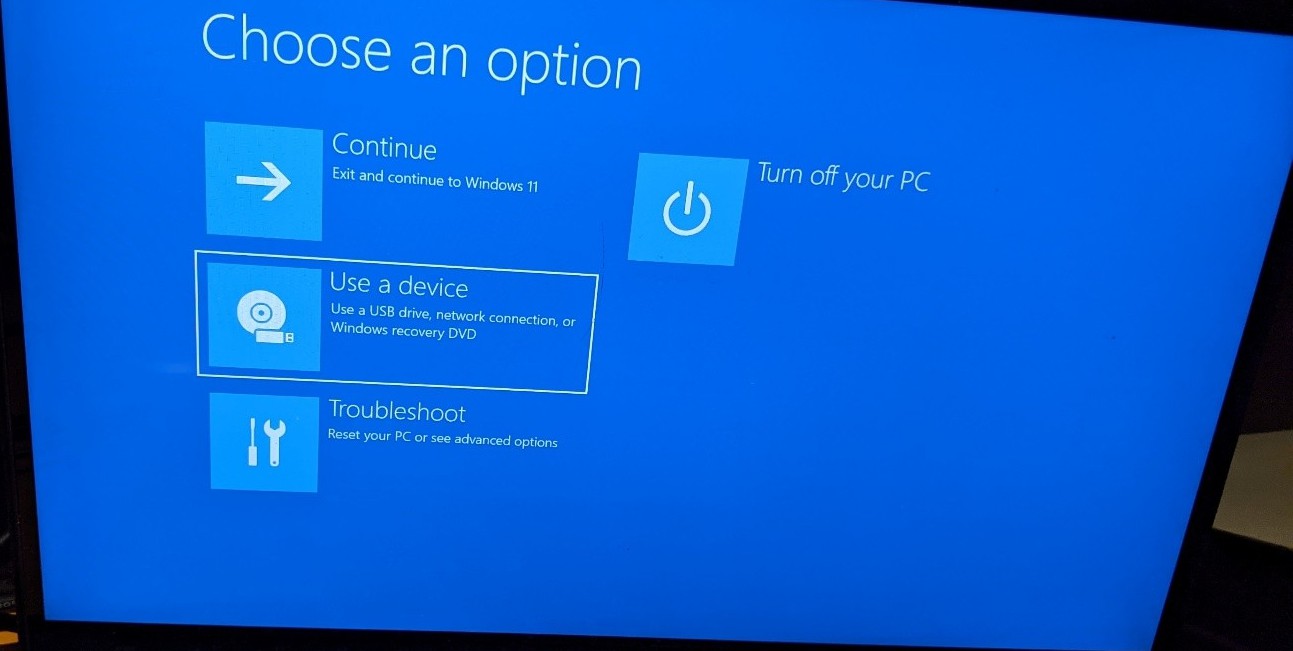
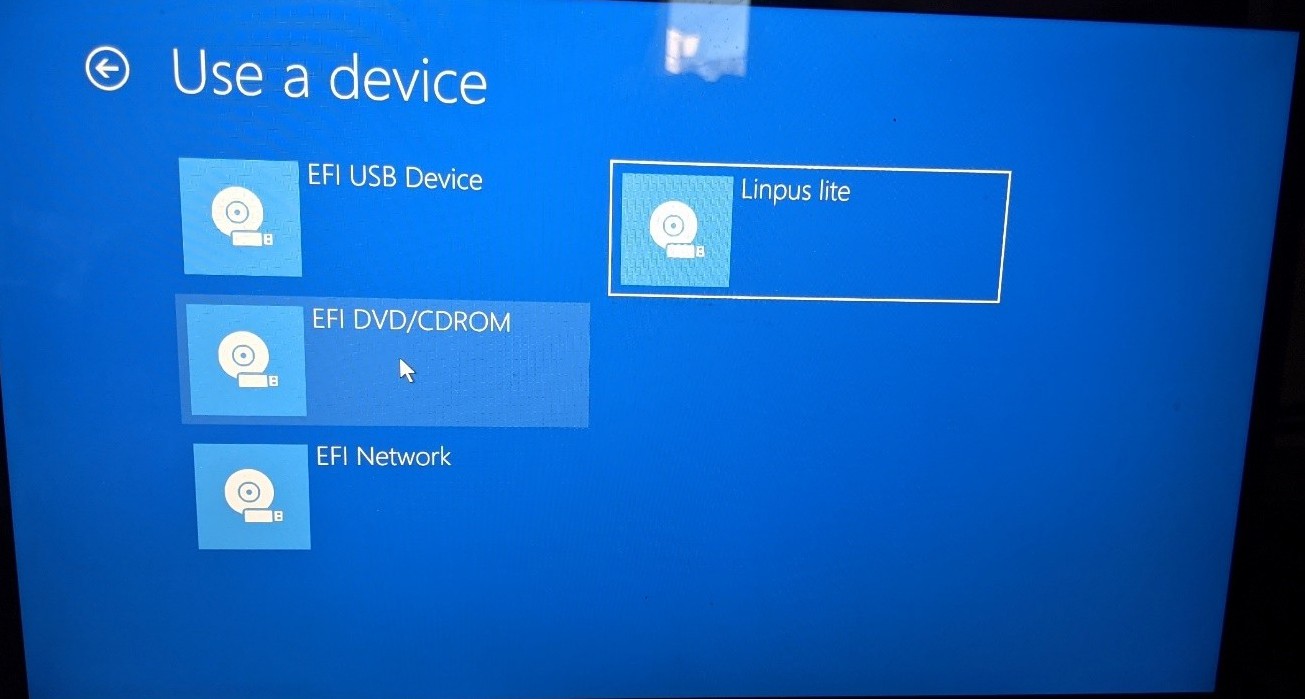
If the keys do not respond at power-on (Windows fast startup does this), use Windows itself: Settings → Recovery → Advanced startup → Restart now, then Use a device, and choose the Linpus lite entry (the EFI USB Device entry does not always work).
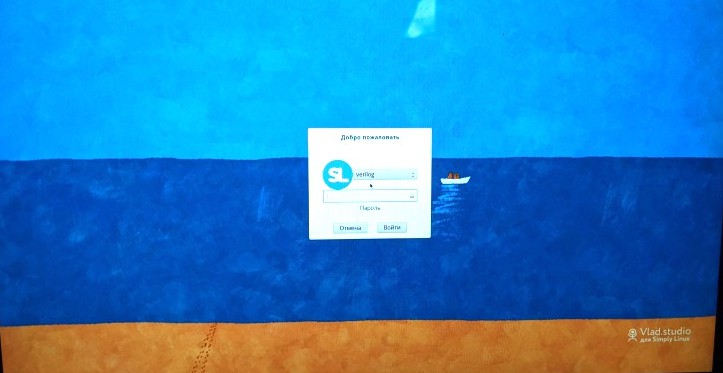


Simply Linux then boots. Login verilog, password
verilog.

6.3. Updating the repositories
Connect to the internet and update the examples. If the directory is already there:
cd ~/projects/basics-graphics-music
git pull
If it is not:
cd ~/projects
git clone https://github.com/chipdesignschool/basics-graphics-music.git
git clone https://github.com/chipdesignschool/systemverilog-homework.gitThe previous edition suggested cloning from
gitflic.ru and mentioned the valid-ready-etc
repository. That one is obsolete; its material went into BGM. The current
addresses are in sections 1.2 and 1.3.
6.4. Checking that the board works
First select the board:
cd ~/projects/basics-graphics-music
./check_setup_and_choose_fpga_board.bash
The script shows the list of supported boards, remembers your choice in the
fpga_board_selection file at the root of the repository, and offers
to create working directories for all the examples.
Then build an example and program the board:
cd labs/1_basics/1_01_and_or_not_xor_de_morgan
./03_synthesize_for_fpga.bashThe example directory names have changed: they are now
grouped by part of the course —
labs/1_basics/1_01_and_or_not_xor_de_morgan instead of the former
labs/01_and_or_not_xor_de_morgan.
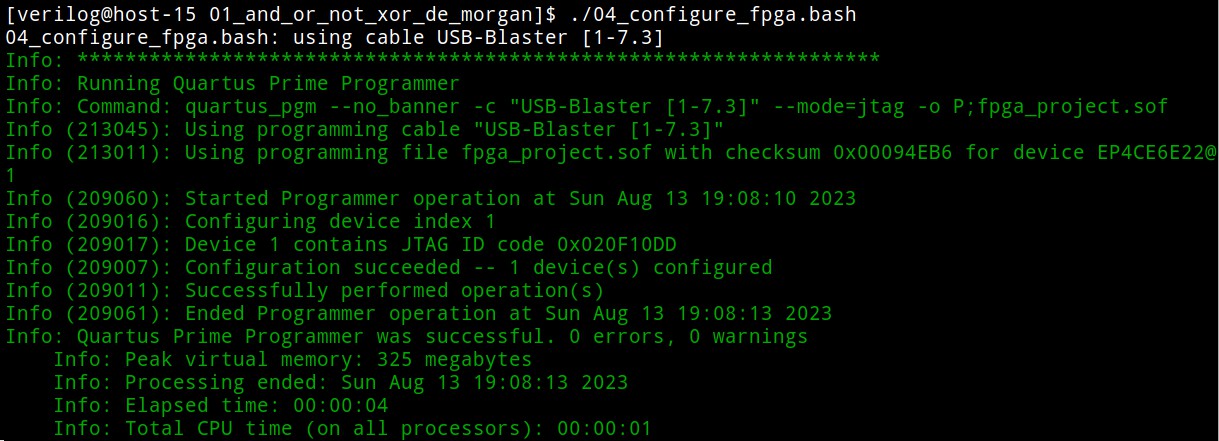
If programming fails on the first try, re-plug the USB Blaster cable and run just the programming step:
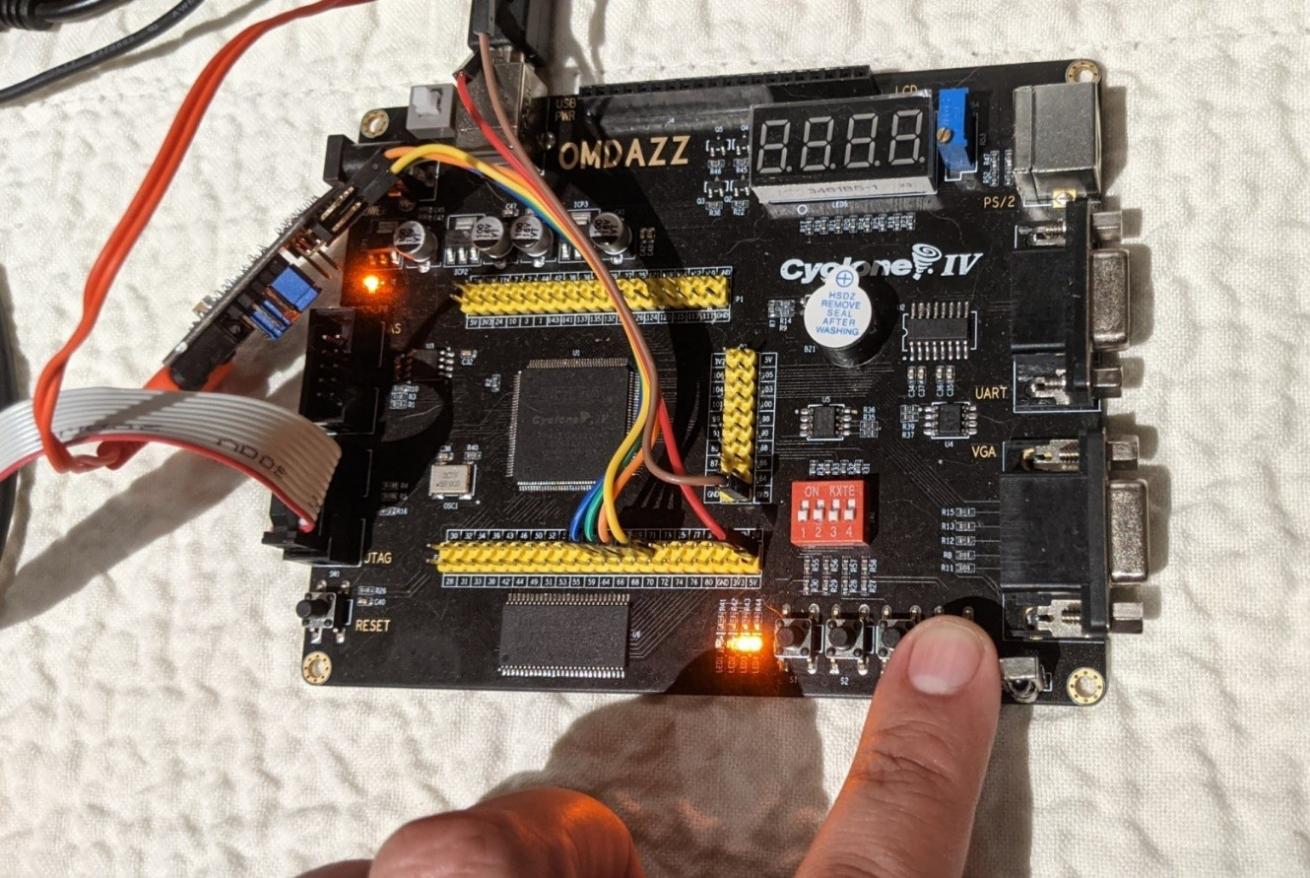
./04_configure_fpga.bashAfter that you can press the buttons on the board and watch the LEDs behave as the example's code says they should.
top ↑7. A virtual machine with the software preinstalled
If booting from a separate SSD is inconvenient, the same image can be run in a virtual machine.
- Download the
.imgfile. - Convert it to the VirtualBox format with
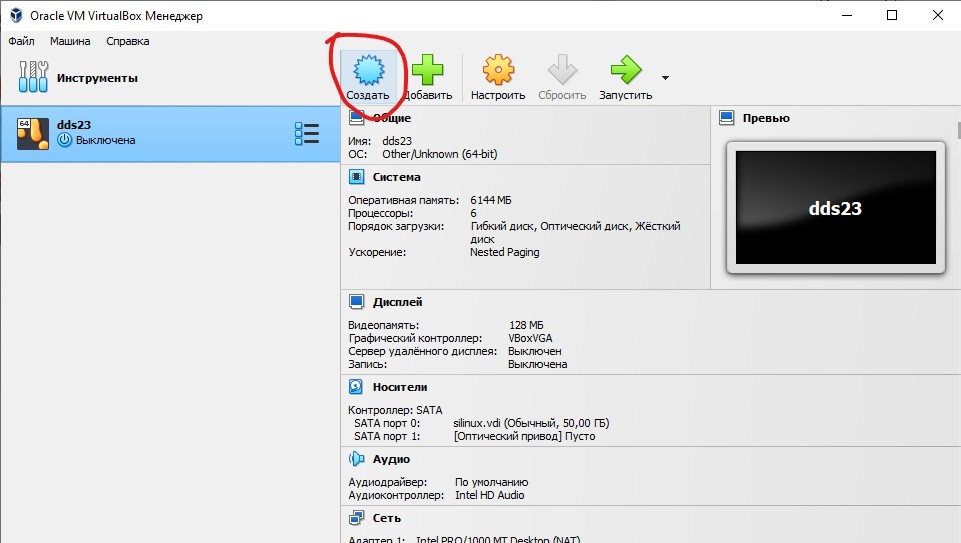
qemu-img:qemu-img convert -f raw -O vdi image.img image.vdi - Create a new machine in VirtualBox and attach the resulting
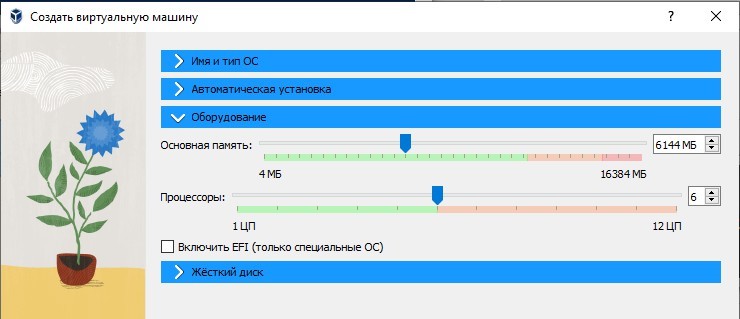
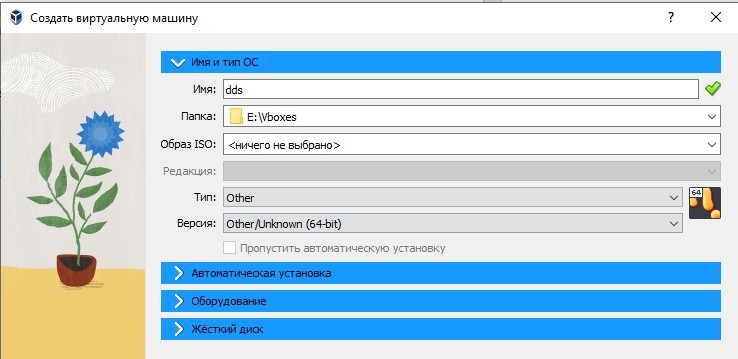
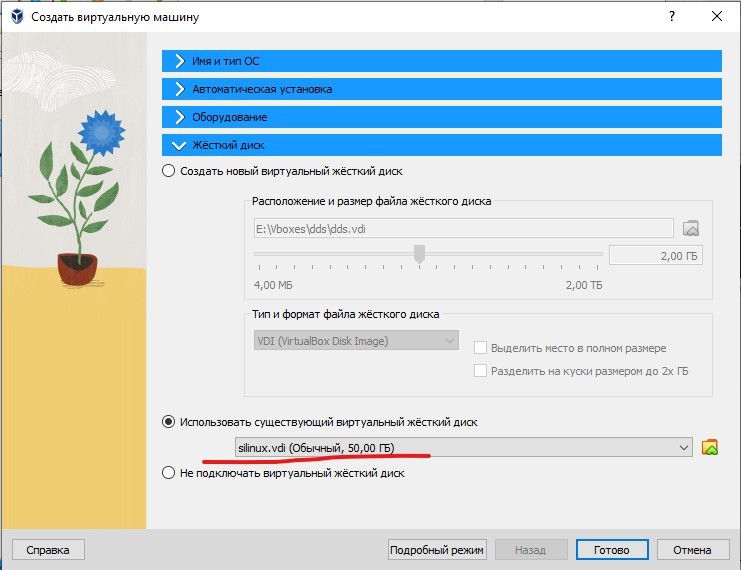
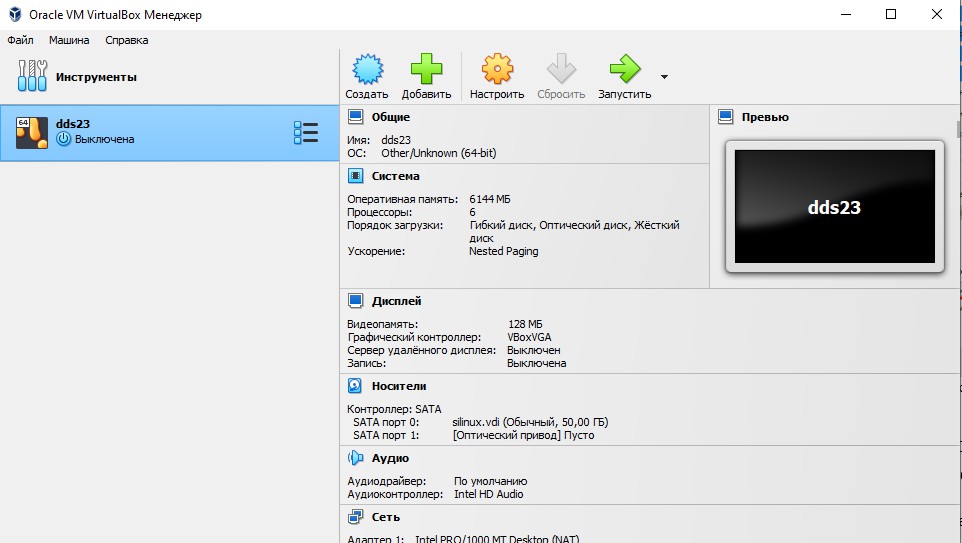
.vdias an existing hard disk. - Login
verilog, passwordverilog.
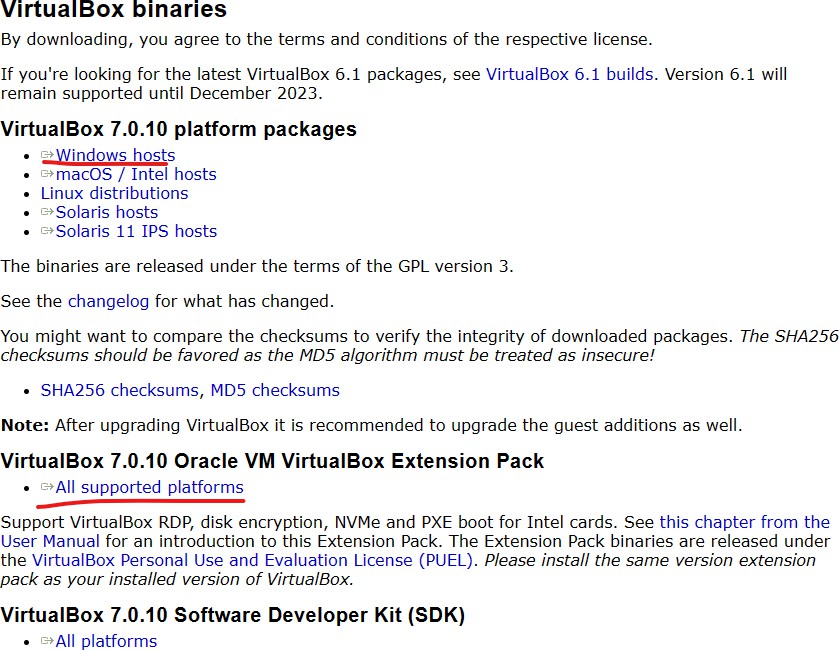
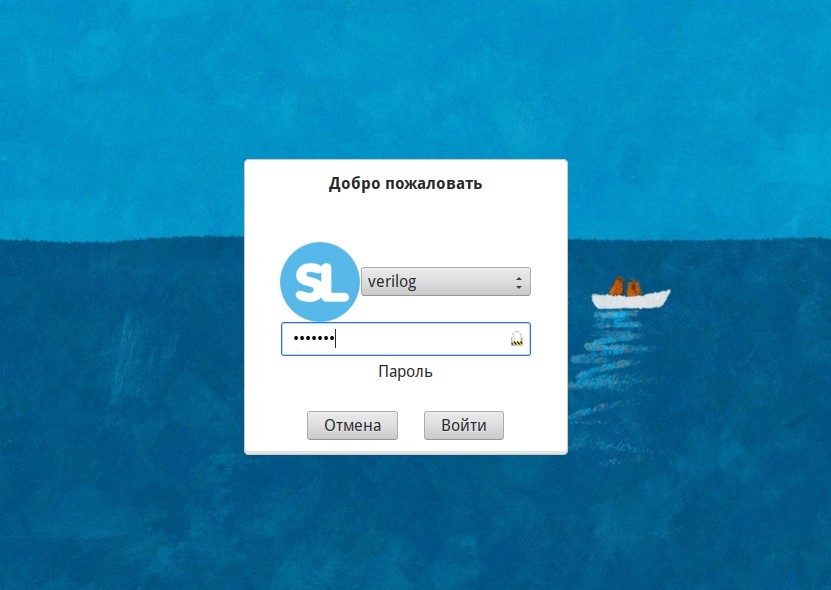



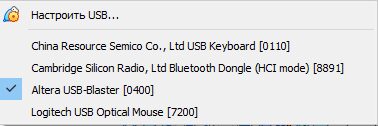
Programming a board from inside the virtual machine requires passing the USB device through to it (Devices → USB), and VirtualBox needs its Extension Pack for that. If the programmer stubbornly refuses to appear, it is easier to work with the board from the host system and use the virtual machine only for simulation and verification.
top ↑8. More about the BGM repository
8.1. What the course consists of
The examples in the repository are grouped by part of the course. Here is a short map, following habr.com/ru/articles/1071736.
| Part | About | What you get on the board |
|---|---|---|
1_basics |
Logic gates, multiplexers, D flip-flops, counters, shift registers, finite state machines | LEDs, the seven-segment display, buttons |
2_graphics |
Generating an image with combinational logic, then with memory | A picture on VGA, HDMI or an LCD screen; games |
3_music |
Recognising notes through a microphone, synthesising sound through a DAC | Sound from a speaker, detection of the note played |
4_microarchitecture |
Pipelines, FIFO queues, credit-based flow control | The things job interviews ask about |
5_cpu |
The schoolRISCV processor (about 300 lines of Verilog, roughly a dozen
RISC-V instructions), plus the picorv32, yrv and
aps cores |
Your own processor in the FPGA, running your programs |
Parts 3 to 5 of the School's course follow this structure: RISC-V assembly in the RARS simulator, then the microarchitecture of a processor core, then integrating the core into a system — I/O from sensors and concurrency through interrupts. The Femto Threads example implements task context switching in about 400 lines of assembly, that is, multithreading on a processor you synthesised yourself.
8.2. How to do the exercises
Every example is a directory with the same set of scripts. The usual order of work is:
- Select the board once for the whole repository:
./check_setup_and_choose_fpga_board.bash - Go into the example's directory and look at
lab_top.sv— that is the file you are meant to change. - Simulate it and look at the waveforms:
./02_simulate_rtl.bash - Build it and program the board:
./03_synthesize_for_fpga.bash
The complete list of scripts:
| Script | What it does |
|---|---|
| 01_clean | delete the results of previous runs |
| 02_simulate_rtl | simulate in Icarus Verilog, show waveforms in GTKWave or Surfer |
| 03_synthesize_for_fpga | synthesis, place, route and programming — in one command |
| 04_configure_fpga | program an already built bitstream, nothing else |
| 05_run_gui_for_fpga_synthesis | open the project in the vendor GUI |
| 06_choose_another_fpga_board | select a different board |
| 07_synthesize_for_asic | synthesise for a custom chip through LibreLane |
| 08_, 09_visualize_asic_… | inspect the layout (OpenROAD, KLayout) |
| 10_run_instruction_set_simulator | run RARS |
| 11_build_software_to_run_on_cpu | build C and assembly with the XPACK compiler |
| 12_upload_software_to_the_board_using_uart | upload the program into the board over UART |
| 13_choose_another_riscv_core_for_software | select a core: aps, yrv, picorv32 |
| 14_run_terminal_program | a terminal: minicom, picocom or putty |
A beginner's walk-through of the first example: verilog-meetup.com — Beginner's guide, and the file docs/beginner-s-guide-to-basics-graphics-music.md in the repository.
top ↑9. More about the systemverilog-homework repository
SVH is a set of small exercises with automatic checking. The structure is simple: the exercise file contains an unfinished module, and next to it sits a testbench that tells you whether your solution passes.
What you need: only Icarus Verilog and Git. No board and no vendor toolchain, which makes SVH a convenient place to start before your board arrives.
git clone https://github.com/chipdesignschool/systemverilog-homework.git
cd systemverilog-homework
# inside an exercise directory:
./run.bash
The exercises go from simple combinational circuits to arithmetic, finite
state machines, pipelines and handshake interfaces — that is, to the same
microarchitectural techniques as the 4_microarchitecture part of
BGM, but without a board.
There are three copies of the repository, as there are for BGM; for the
School's classes take the chipdesignschool one:
| School of Digital Circuit Synthesis | github.com/chipdesignschool/systemverilog-homework |
| Development | github.com/yuri-panchul/systemverilog-homework |
| International seminars | github.com/verilog-meetup/systemverilog-homework |
top ↑10. Turning the examples into a custom chip with Tiny Tapeout
Tiny Tapeout is a service that gathers projects from many participants onto one die and sends it to a foundry. This way of manufacturing is called an MPW (multi-project wafer), or a shuttle: the cost of the mask is split between all participants, which makes manufacturing one small circuit affordable for a university and sometimes for an individual.
There is a ready template for BGM that takes the lab_top module
out of an example — precisely the file a student was editing while debugging
that example on a board. Manufacturing is done at the foundry of the IHP
institute (Leibniz-Institut für innovative Mikroelektronik) in Germany.
What to do
- Debug the example on an FPGA the usual way (sections 8.2 and 4).
- Check locally that the example passes chip synthesis:
This is the same RTL-to-GDSII flow that is used for real manufacturing, so problems show up in advance../07_synthesize_for_asic.bash ./08_visualize_asic_synthesis_results_1.bash - Create a repository from the Tiny Tapeout template and move
lab_topinto it. - Submit the project to the next shuttle through the Tiny Tapeout site.
More:
- habr.com/ru/articles/1084844 — an article about turning BGM examples into a chip (in Russian);
- verilog-meetup.com — From FPGA to ASIC using template;
- tinytapeout.com — the dates of the upcoming shuttles and the cost of taking part.
The cost of participation and the shuttle dates change, and the sources available while this edition was prepared carried no specific figures. Check the Tiny Tapeout site.
top ↑11. Additional information
Documentation inside the repository
The docs/ directory holds separate files that are worth reading alongside this manual:
| File | About |
|---|---|
| IntelQuartus.md | notes on Quartus |
| GowinEDA.md | notes on Gowin EDA |
| Yosys.md | the open-source flow |
| vivado_installation_guide/ | installing Vivado, with illustrations |
| wsl.md | working under Windows Subsystem for Linux |
| qemu.md | running under QEMU |
| beginner-s-guide-to-basics-graphics-music.md | a beginner's guide |
| boards/README.md | the board table (see section 3) |
Articles and other material
- An overview of the School's course (Habr, in Russian)
- The bootable SSD with the software (Habr, in Russian)
- From FPGA to a chip through Tiny Tapeout (Habr, in Russian)
- verilog-meetup.com — notes, board guides for the Tang boards in five languages, toolchain comparisons
- edu.yadro.com/chip-design-school — the School's site
What this manual leaves out
The repository's scripts also support one more toolchain —
Efinity for Efinix FPGAs
(scripts/steps/00_setup_efinity.source_bash, Linux only).
Installing it is deliberately not described here: the only Efinix board
(Trion T20) sits in
boards/zzz_postponed_and_retired/, which means it is not among the
active boards and does not appear in the table in section 3. If you do get such
a board, read the script: it looks for Efinity through the
EFINITY_HOME variable and through an efinity_sh.sh
command on PATH.
Where to ask
The chat of the School of Digital Circuit Synthesis is the place for questions about the classes and about installation. Bugs and inconsistencies in the examples themselves are better filed as issues in the repository: that is the most reliable way for the developers to hear about them.
top ↑12. Frequently asked questions
Do I have to install every toolchain?
No. Only the one that matches your board: Quartus for Altera, Vivado for Xilinx, Gowin EDA or OSS CAD Suite for Gowin, OSS CAD Suite for Lattice. If you have no board, you need none of them: the examples simulate in Icarus Verilog and the SVH exercises are done entirely without a board.
I have no board. Can I still learn?
Yes. Simulation in Icarus Verilog with waveform viewing covers a large part of the course, and the whole SVH repository needs no board at all. For the graphics examples there is a way to look at the result as an image without having a monitor attached to a board.
Do I need to set PATH and environment variables?
No, provided the tools are installed in standard locations; the scripts find
them. The variables (QUARTUS_ROOTDIR,
XILINX_VIVADO, GOWIN_VERSION_DIR and the rest) are
for two cases: an installation in an unusual directory, and several versions
where you want to force a particular one.
Can I keep several versions of Quartus at once?
Yes, and for old boards you have to: Cyclone II needs Quartus II 13.0sp1, Cyclone III needs 13.1, and current boards want Quartus Lite 21.1 or newer. They coexist happily, and the scripts pick the one that suits your board's chip.
Why does the script say that no version of Quartus is suitable?
Because none of the installed versions can build for the chip on the selected board. The message lists what was found. The usual causes are an old board (which needs Quartus 13.x) or the DE23-Lite (which needs Quartus Pro). See section 3.1.
The scripts do not run under Windows
Run them from Git Bash, not from cmd.exe and
not from PowerShell. Git Bash comes with Git (section 4.1.8).
Icarus reports syntax errors in the examples
Most likely you have version 11 or 12. You need 13, preferably 14 — some examples use constructs the older versions do not understand. See section 4.1.5.
The board does not program on the first try
Re-plug the programmer cable and run
./04_configure_fpga.bash — there is no need to rebuild. Under
Linux, check the udev rule (subsection 4.2.1.2), including the USB Blaster III
line if you have a DE23-Lite.
On a Mac the program will not start: "the developer cannot be verified"
Remove the quarantine attribute:
xattr -rd com.apple.quarantine ~/oss-cad-suite. See section
4.3.
Which board should I buy if I do not have one?
A Tang Nano 9K with the LCD screen module and the sound modules: roughly 60 dollars for the set, fast synthesis, and it works under all three operating systems including macOS. Altera and Xilinx boards need a virtual machine on macOS.
Where is the full list of boards?
In section 3 of this manual and in the repository's boards/README.md, which is updated together with the code.